• blog
  • about
  • Email List
  • Archives
Menu

HAZEL HAUS

Street Address
the best things in life are edible
Phone Number
A Food + Travel Blog

Your Custom Text Here

HAZEL HAUS

  • blog
  • about
  • Email List
  • Archives

Nutella Knots

January 28, 2024 Jenna Hazel

When I first learned about Nutella, it was all I wanted. Heck, it’s all I thought about. Nutella on toast. Nutella on apples. NUTELLA ON EVERYTHING.

Well somewhere along the lines I kind of stopped using it all. Probably a result of many dieting publications claiming it was awful for you.

Well, to hell with that! I’m back on the nutella game and man do we have a lot of catching up to do.

So many years wasted thinking it was bad.

So, so grateful to have worked to make a mindset shift that feels much more free. I might even venture to claim it’s nourishing. Too far? Okay, I’m not claiming it has any nutritious value per say, but it can still be nourishing. Maybe not in the same way a kale salad is, but in the way that it makes my heart happy — it’s nourishing my soul.

And since I claimed nourish as my word for 2024, I can see a lot of Nutella in my future.

These Nutella knots were born out of my rekindled love affair with the iconic chocolate-hazelnut spread and I can guarantee you will LOVE them. I recently added them to the Hazel Haus Bake Shop menu, but since so many of you don’t live within driving distance I wanted you to be able to have a taste of them in your own kitchen.

Don’t be intimidated by how long the dough takes to sit in the fridge. Just plan ahead.

Don’t get tripped up on how to tie them into knots. I have photos below, but if you need a little extra help I recommend this video. Don’t worry about being perfect. Just jump in and have fun.

I hope you enjoy. <3

Nutella Knots

Makes: 8 knots

Recipe for the dough is by Alison Roman

For the dough:

  • 1 cup whole milk

  • ¼ cup sugar

  • 2 ¼ teaspoons active dry yeast

  • 3 ¾ cups all-purpose flour (540g)

  • 1 ½ teaspoons baking powder

  • 1 ½ teaspoons kosher salt

  • 2 large eggs

  • 1/2 cup unsalted butter, room temperature, cut into ½” pieces

For the filling:

  • 1 cup nutella

Additional:

1 egg, whisked for brushing on knots prior to baking

Directions:

  1. Whisk whole milk, sugar, and yeast together in the bowl of a stand mixer fitted with the dough hook attachment. 

  2. Add the flour, baking powder, and salt. Mix on low speed until the dough starts to come together into a dry, shaggy mess. Add the eggs, one at a time, and mix on medium speed until you’ve got a smooth, sticky dough with no visible dry spots.

  3. With the mixer running, add the butter a few pieces at a time, letting the butter incorporate before adding more pieces. Eventually, the dough will take all the butter, disappearing into a silky, sticky dough. Knead this on medium speed for 3 to 4 minutes to continue to develop the gluten.

  4. Transfer the dough into a greased, medium bowl and immediately cover with plastic wrap. Place in the refrigerator for 12–24 hours (during this time, the dough is slowly rising which develops great flavor, the flour is hydrating which firms the dough up, and the butter is resolidifying, making everything easy to roll out). I have done this after only leaving it in the fridge for 6 hours and it works, but the dough isn’t as ideal to work with. So if you’re wanting nutella knots faster, there is that option, but know that the dough might be tougher to work with.

  5. Transfer the dough to a lightly floured work surface. You might want to leave it at room temperature for 10-15 minutes if it's really cold and difficult to roll out.

  6. With a rolling pin, roll the dough into a 19x12in rectangle.

  7. Evenly spread out the nutella using an offset spatula.

  8. Grab one of the long sides of the rectangle and fold it down to cover 2/3 of the dough, then grab the other side and fold it over the top (see pictures above for reference).

  9. Go over the dough a couple of times with a rolling pin to even out the sides.

  10. Use a sharp knife or bench scraper to cut the dough into 8 strips, roughly 2 inches each.

  11. Split each strip into three, leaving one side joined. Braid the strips to create a three-stranded plait. Grab the end of the plait and roll it up to create a bun—place all the shaped buns on a baking sheet lined with parchment paper. Cover with plastic wrap and allow the buns to rise for 20-30 minutes or until they have almost doubled in size.

  12. Preheat oven to 350 degrees.

  13. Remove the plastic wrap and gently brush the knots with the whisked egg.

  14. Bake at 350 degrees for 20-25 minutes or just until golden brown. Remove from the oven and enjoy!

Note: These freeze beautifully so feel free to bake a bunch and then place them in a freezer safe container once they are completely cooled and enjoy for many days to come.

In Food: More Sweet Things, Food: Bread
Comment

Funfetti Hand Pies With Raspberry Filling

November 6, 2023 Jenna Hazel

The idea for these funfetti hand pies came from a childish desire to play with color. I’ve always loved anything funfetti. The colors just call to me. When I saw A Moment Of Sugar throw some sprinkles in her pie dough I was immediately taken aback. It spoke so dearly to my inner child — the one that craves creativity. I knew I had to create a version that incorporated those bright colors as well. So here we are.

Let me just say that these hand pies are a project. There is no instant gratification to be found here. The dough needs time to rest and the rolling out of the dough takes a hot minute. But, let me also say that the results are worth it. If you hold steady until the end you will have a plate full of very impressive hand pies ready to show off at your next gathering. Let’s jump in.

Funfetti Hand Pies With Raspberry Filling

Makes 12 hand pies

For the Crust:

  • 3 cups all-purpose flour

  • 2 tablespoons granulated sugar

  • 1 ½ teaspoon salt

  • 1 ½ cups unsalted butter, chilled, cut into 1-inch pieces

  • 1 tablespoon apple cider vinegar

  • ⅓ cup ice water

  • 1/4 cup sprinkles, I used these

For the Filling:

  • 10 oz frozen raspberries

  • ¼cup sugar

  • 1 tablespoon cornstarch

  • 1 tablespoon lemon juice

  • 1/2 cup Water, divided

  • 1 teaspoon vanilla

  • 1/2 teaspoon salt

For the Topping

  • 1 egg

  • turbinado sugar

Make the crust:

Combine flour, sugar and kosher salt in a large bowl, and use your hands to mix well.

Add the butter to the bowl, and use your palms and fingertips to smash the pieces into the flour until you’ve got large, flat butter pieces that are evenly distributed among the flour. Pop the bowl into the freezer for 5 or so minutes.

Add the sprinkles to the flour mixture and gently incorporate.

Combine vinegar and 1/3 cup water, and drizzle over the flour-butter mixture. Like you’re running your hands through sand, deliberately yet delicately mix the water into the flour/butter mixture. Resist the urge to add more water until you see that it’s absolutely necessary, and even then, use only an additional tablespoon or two.

Turn the dough out onto a work surface, and use your palms to knead it lightly until the shaggy ball transforms into a slightly-less shaggy ball of dough. (It should still be relatively shaggy.) Pat the dough into a disc about 1 inch thick, rotating it to create a nice circle. Wrap in plastic or place in a resealable plastic bag and chill until firm, at least 2 hours. The dough will hydrate a bit as it sets in the fridge so do not be alarmed at the shagginess of the dough.

While the dough rests make the filling.

For the Filling:

In a saucepan, over medium heat, add the raspberries, sugar, lemon juice, and 1/4 cup water. Cook on low to medium heat until all the sugar has dissolved. Stir periodically to ensure the mixture incorporates.

Make a cornstarch slurry by combining the remaining 1/4 cup water with cornstarch. Add it to the raspberries. Continue to cook on medium heat until the filling comes to a boil and becomes thick and glossy. Remove and let cool for a while. All to full cool before using to assemble to pies.

Assembling the pies:

Preheat the oven to 425. On a lightly floured work surface, roll the dough into a 9 x 13 inch square-ish shape or until it is about 1/4 inch thick. Cut the dough into 3” squares using a pastry knife or bench scraper. Transfer 6 pieces of dough to a baking sheet. This will be the bottoms of your pies. Then place 1 tablespoon of filling on each bottom.

The next part can feel intimidating, but I promise, it’s not as hard as it looks. And if all else fails here is a video to guide you. Cut some of the rolled out dough into thin 1/4” thick strips. Lay 3 strips ontop of the pie going diagnol one direction and the other 3 diagonal the other direction. Then weaves the strips of pie dough under one another as if you were weaving a basket. The video shows this well. Cut the excess pie crust with a bench scraper to create a nice sealed edge.

Whisk the egg with a teaspoon of water and use it to brush the crust. Sprinkle with turbinado sugar. Optional, but it enhances the texture of the pie so much.

Place the hand pies in the oven and bake until the crust is deeply golden brown. About 12-16 minutes.

Remove pies from the oven and let cool completely before eating.

Note: Alternatively to doing the lattice topping you could just cut another 3” square piece of pie dough and press it to the bottom pie dough using a fork. This is an equally pretty technique that might seem less intimidating.

In Food: More Sweet Things
Comment

No-bake Cookie Bars made with all Natural Ingredients (GLuten-FRee + Dairy-Free)

October 23, 2023 Jenna Hazel

These no-bake cookie bars started as my go-to when I needed to bring a dessert where there were going to be a variety of diet restrictions. The recipe is dairy-free and gluten-free which makes it easy for those with restrictions to enjoy without worry. However, they are so dang delicious that they quickly evolved into a dessert that I bring everywhere — regardless of dietary restrictions. It is without a doubt the recipe I’ve been asked to share the most. So it feels right to share it with all of you.

These no-bake cookie bars are a nod to the deliciously, chocolatey and peanut-buttery goodness that I grew up making, but using all natural ingredients. Using just coconut oil, peanut butter, maple syrup, cocoa powder, and oats I feel transported back to those one-pot treats, but get to enjoy ingredients that I feel good about treating myself to on the regular.

I am certain you’re going to enjoy this recipe and it will find itself in a consistent rotation in your home.
No-Bake Cookie Bars

Bottom Layer:

  • 1/2 cup + 2 tablespoons of coconut oil

  • 1/4 cup peanut butter, the drippy natural kind with only salt and peanuts as the ingredients

  • 1/2 cup maple syrup

  • 1/2 cup cocoa powder

  • 1/2 teaspoon salt

  • 1 teaspoon vanilla

  • 2 1/4 cup rolled oats, these are my favorite

Top Layer:

  • 2 tablespoons coconut oil

  • 1/2 cup peanut butter

  • 2 tablespoons maple syrup

Line a 9x9 pan with parchment paper.

Bottom Layer: First, you’re going to make the bottom layer so follow the ingredient measurements listed under “bottom layer’. Grab a medium saucepan and add in the coconut oil, peanut butter, and maple syrup. Heat the saucepan over medium-low heat until the ingredients have melted. Whisk to combine the ingredients. Whisk in the cocoa powder, salt, and vanilla. Stir in the oats. Press the cookie mixture into the 9x9 pan and place in the freezer while you make the top layer. It will need to be in there about 15-20 minutes or until they have set up enough to put the top layer.

Top Layer: Now you’re going to make the top layer. Combine all the ingredients listed under '“top layer” into a small saucepan and heat until melted. Whisk to combine.

Remove the bottom layer from the freezer and if you can touch it without getting chocolate on your finger then it is ready to be topped. Spread the top layer onto the bottom layer. Place back in the freezer until the top layer is fully set. Cut into squares and serve.

Because of the coconut oil these will melt quickly at room temperature so I recommend keeping them in the freezer or fridge.

In Food: Brownies + Cookies, Food: More Sweet Things
Comment

Honey Cinnamon Apple Galette

October 4, 2023 Jenna Hazel

When it comes to desserts my heart will always gravitate towards chocolate. Like, someone is saying, “Should we get dessert” and I am very vividly imaging a chocolate cake with chocolate frosting or chocolate ice cream with chocolate sauce. Chocolate is dessert. Dessert is chocolate. You get the picture.

In this season, the fall season, I’ve allowed my perception to shift. Maybe it’s the copious amount of apples filling my fridge or the crisp air that’s got me turning from my usual chocolate dessert to an apple filled pastry. Whatever it is, this honey cinnamon apple galette with a scoop of vanilla ice cream has me rethinking my chocolate narrow-minded-ness.

This galette has a caramely flavor from the honey supported further with the brown sugar. The crust is flaky. It’s saucy and juicy and flavorful and just so dang yummy.

If you’ve got a lot of apples to work through, this is for you. And if you have to hunt down a bunch of apples to make this galette happen i guarentee your labors ill be worth it.

Enjoy, friends.

Honey CInnamoN Apple Galette

Recipe adapted from Alison Roman

For the Crust:

  • 3 cups all-purpose flour

  • 2 tablespoons granulated sugar

  • 1 ½ teaspoon salt

  • 1 ½ cups unsalted butter, chilled, cut into 1-inch pieces

  • 1 tablespoon apple cider vinegar

  • ⅓ cup ice water

For the filling:

  • 5 cups firm, tart baking apples, cored and thinly sliced

  • 1/2 cup honey

  • 1/4 cup brown sugar

  • 2 tablespoons all-purpose flour

  • 1 tablespoon apple cider vinegar

  • 1 teaspoon ground cinnamon

  • 1 teaspoon vanilla

For the Assembly:

  • 1 large egg

  • 3 tablespoons turbinado sugar (optional, but I highly recommend)

Directions

  1. Make the crust: Combine flour, sugar and kosher salt in a large bowl, and use your hands to mix well.

  2. Add the butter to the bowl, and use your palms and fingertips to smash the pieces into the flour until you’ve got large, flat butter pieces that are evenly distributed among the flour. Pop the bowl into the freezer for 5 or so minutes.

  3. Combine vinegar and 1/3 cup water, and drizzle over the flour-butter mixture. Like you’re running your hands through sand, deliberately yet delicately mix the water into the flour/butter mixture. Resist the urge to add more water until you see that it’s absolutely necessary, and even then, use only an additional tablespoon or two.

  4. Turn the dough out onto a work surface, and use your palms to knead it lightly until the shaggy ball transforms into a slightly-less shaggy ball of dough. (It should still be relatively shaggy.) Pat the dough into a disc about 1 inch thick, rotating it to create a nice circle. Wrap in plastic or place in a resealable plastic bag and chill until firm, at least 2 hours. The dough will hydrate a bit as it sets in the fridge so do not be alarmed at the shagginess of the dough.

  5. Heat the oven to 375 degrees. Remove dough from refrigerator, and let it soften slightly at room temperature, about 10 minutes or so.

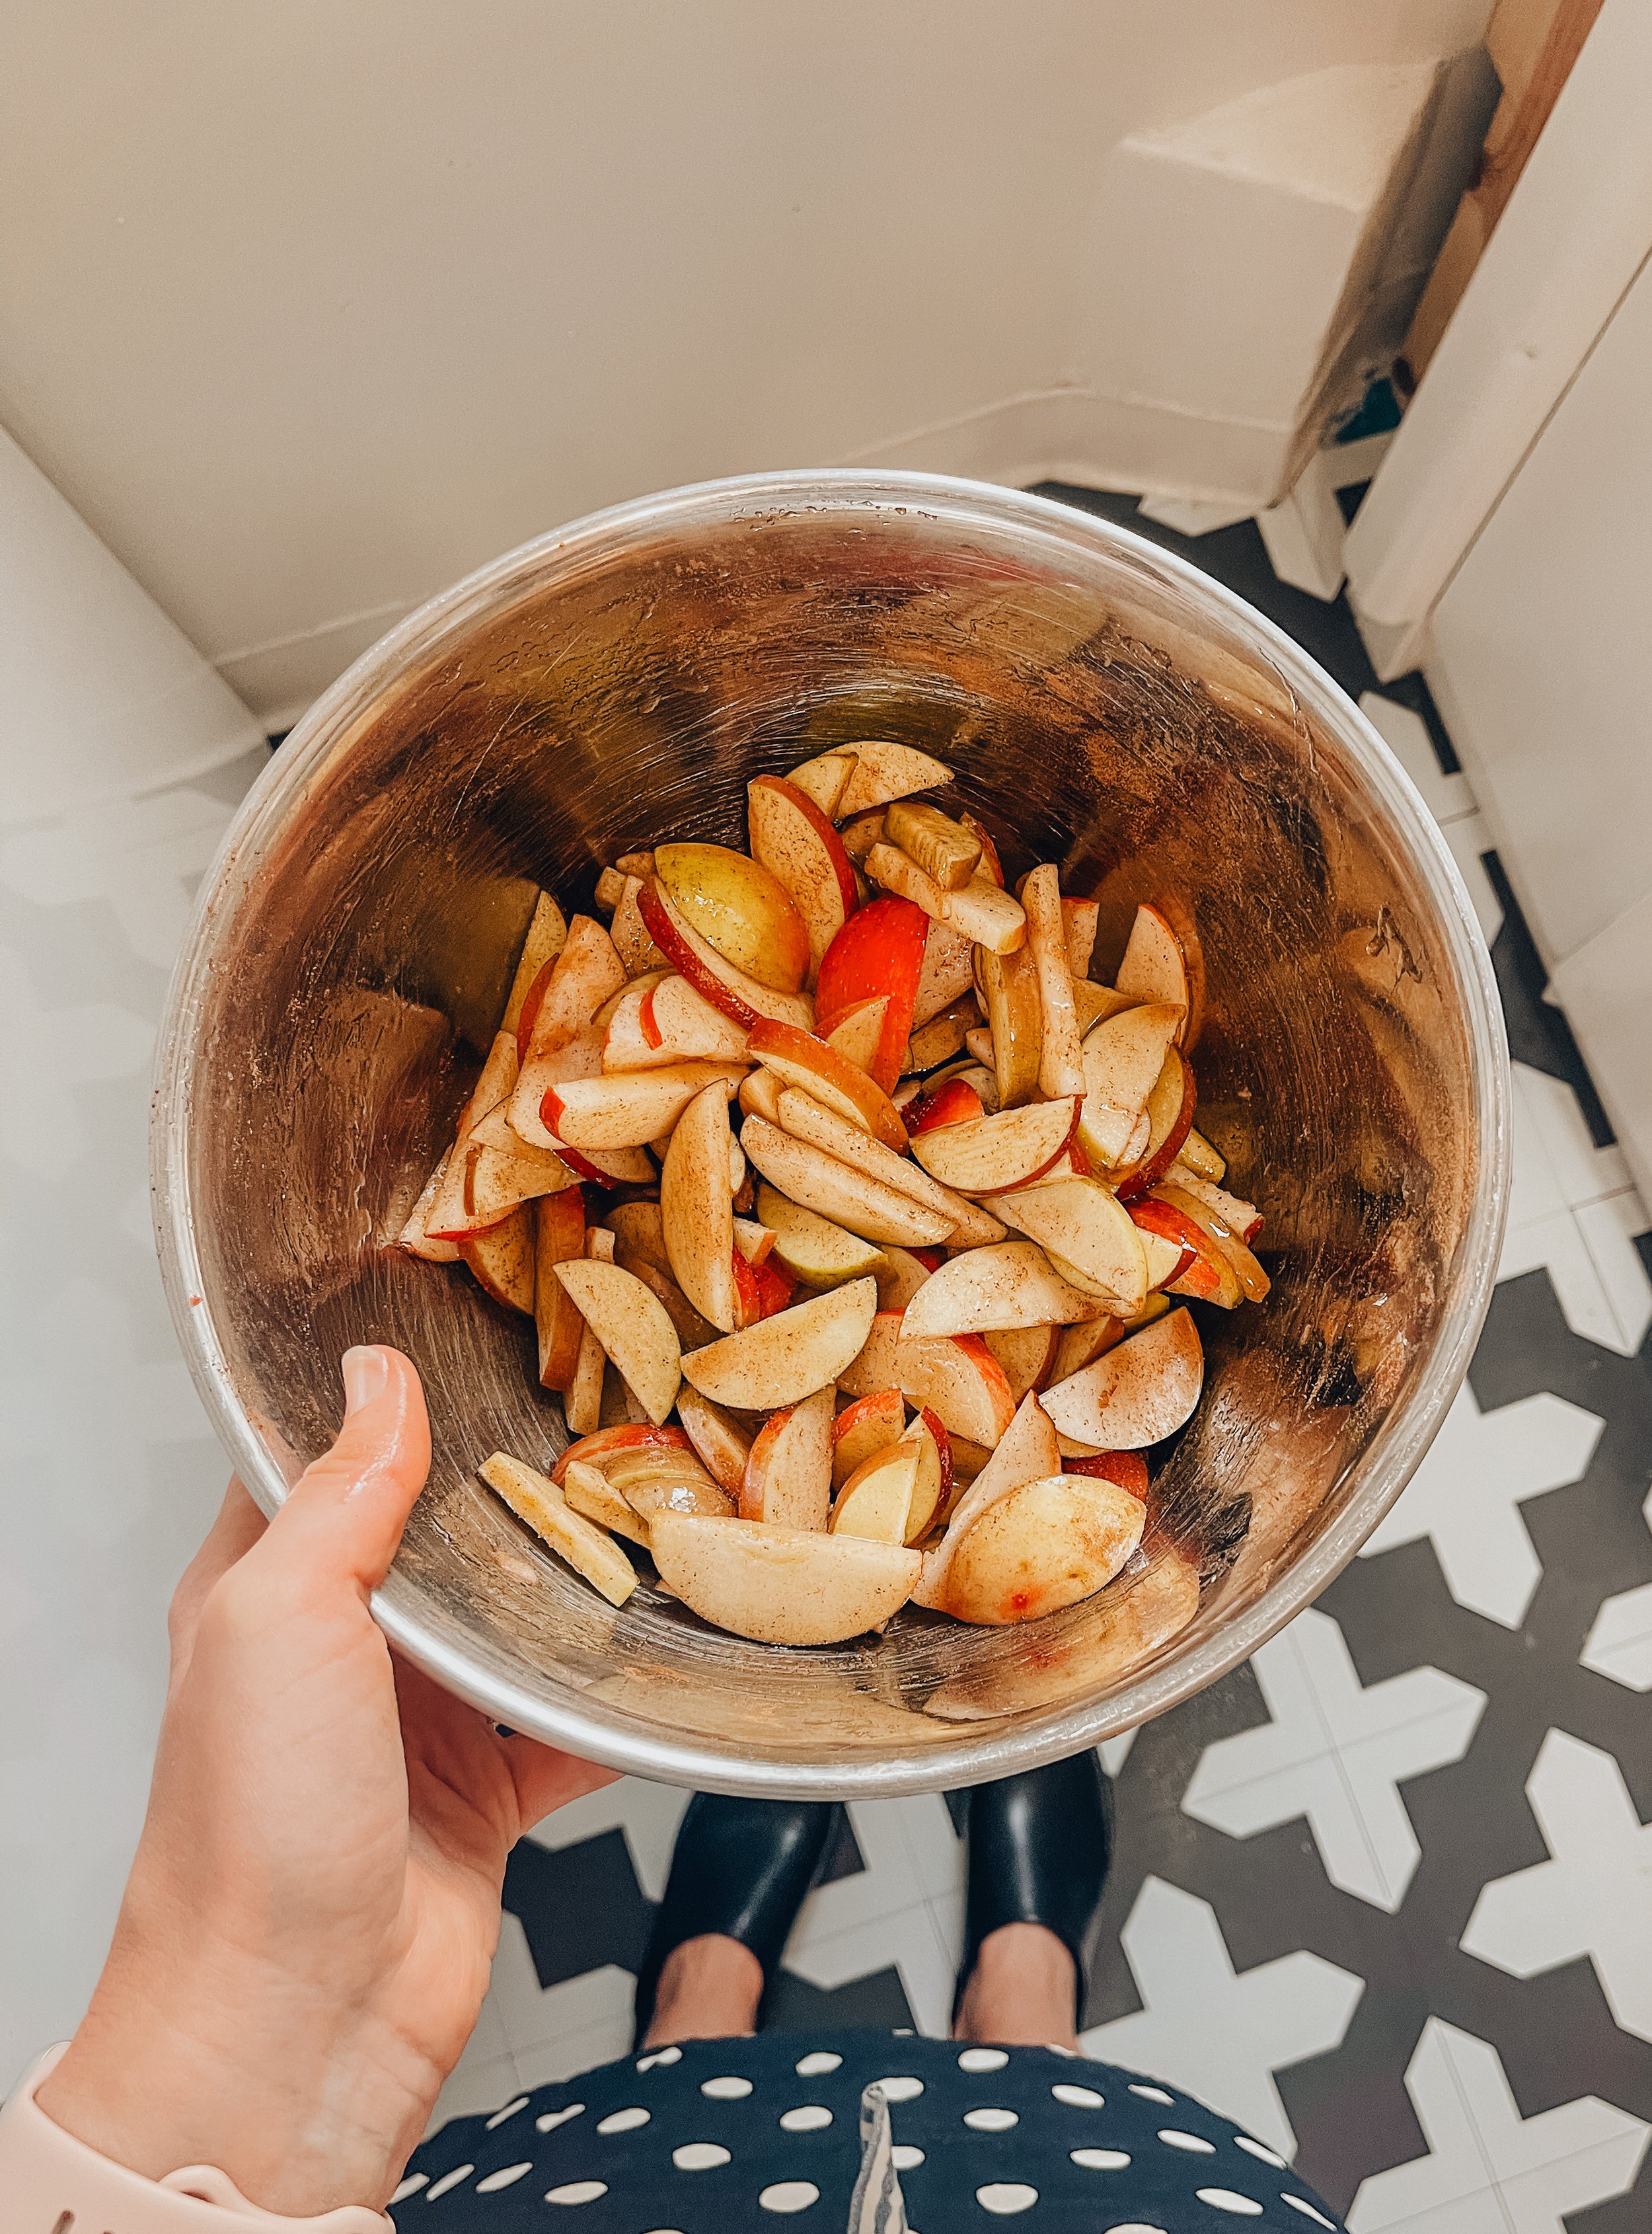
  6. As dough rests, make the filling: Combine apples, honey, brown sugar, 2 TBS flour, vinegar and the cinnamon in a large bowl. Toss the ingredients so every slice of apple is evenly coated.

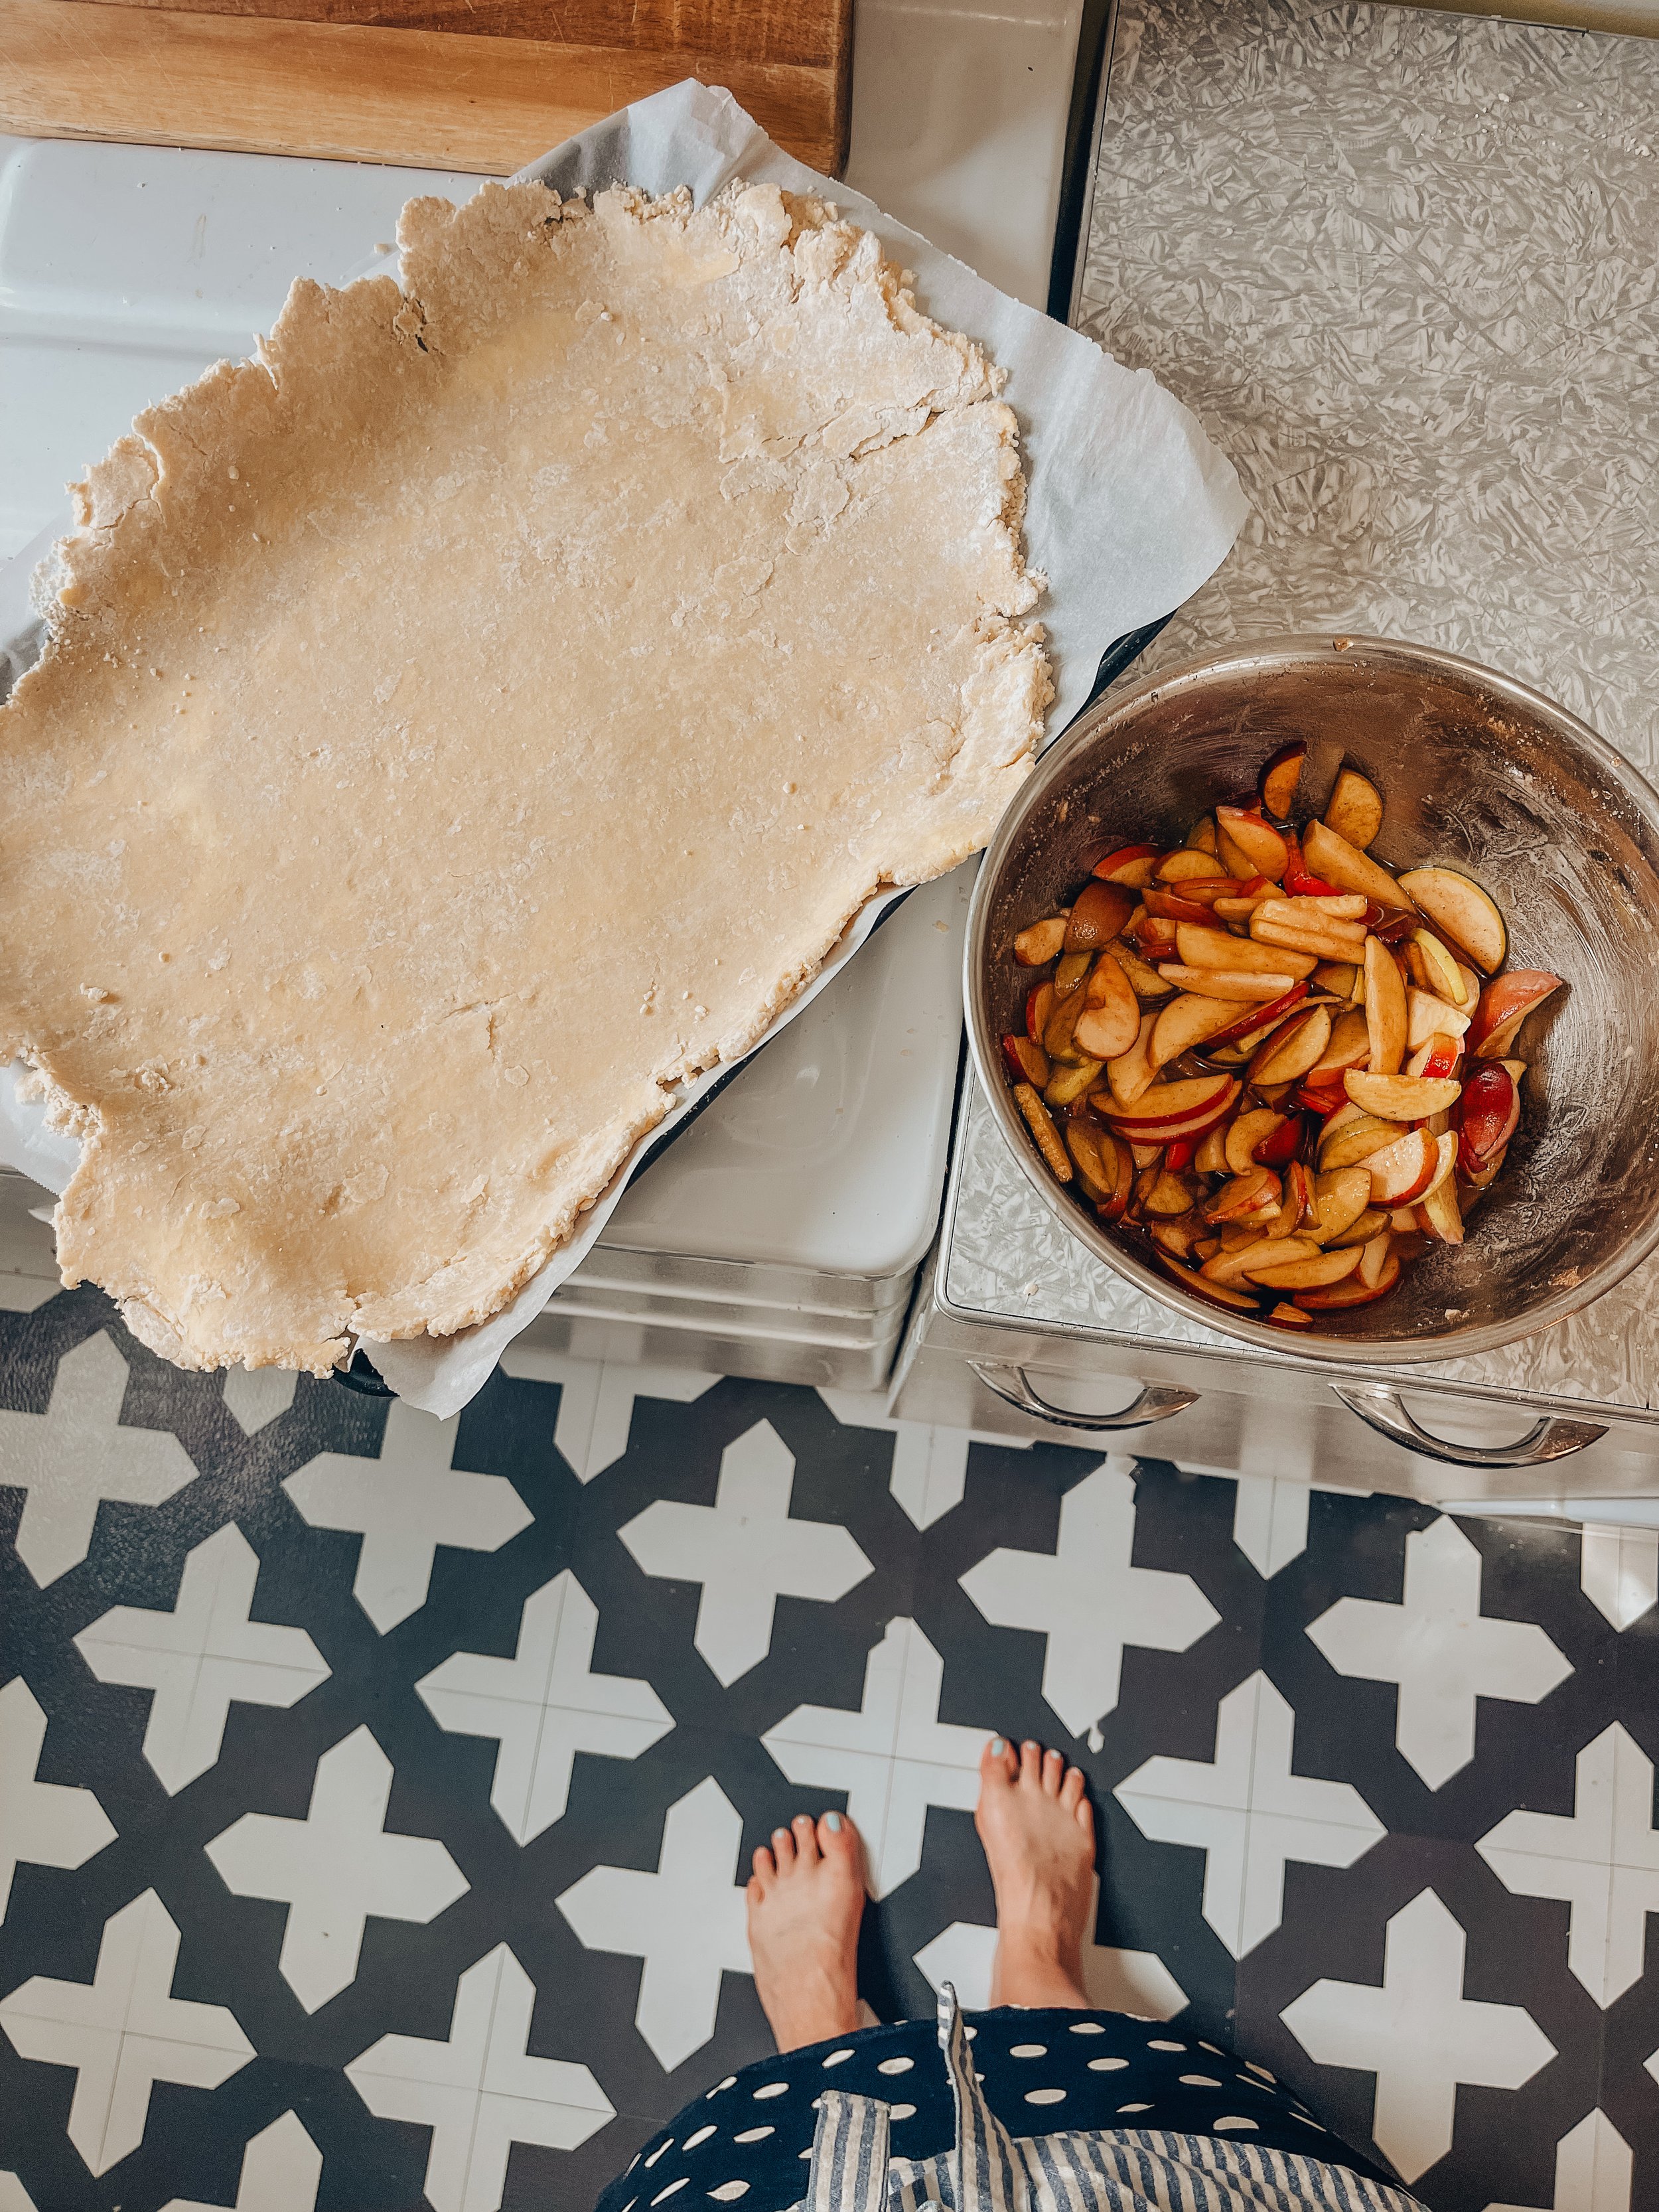
  7. On a lightly floured work surface, roll the dough into a 9 x 13 inches square-ish shape or until it is about 1/4 inch thick. Transfer dough to a large, lightly greased baking sheet.

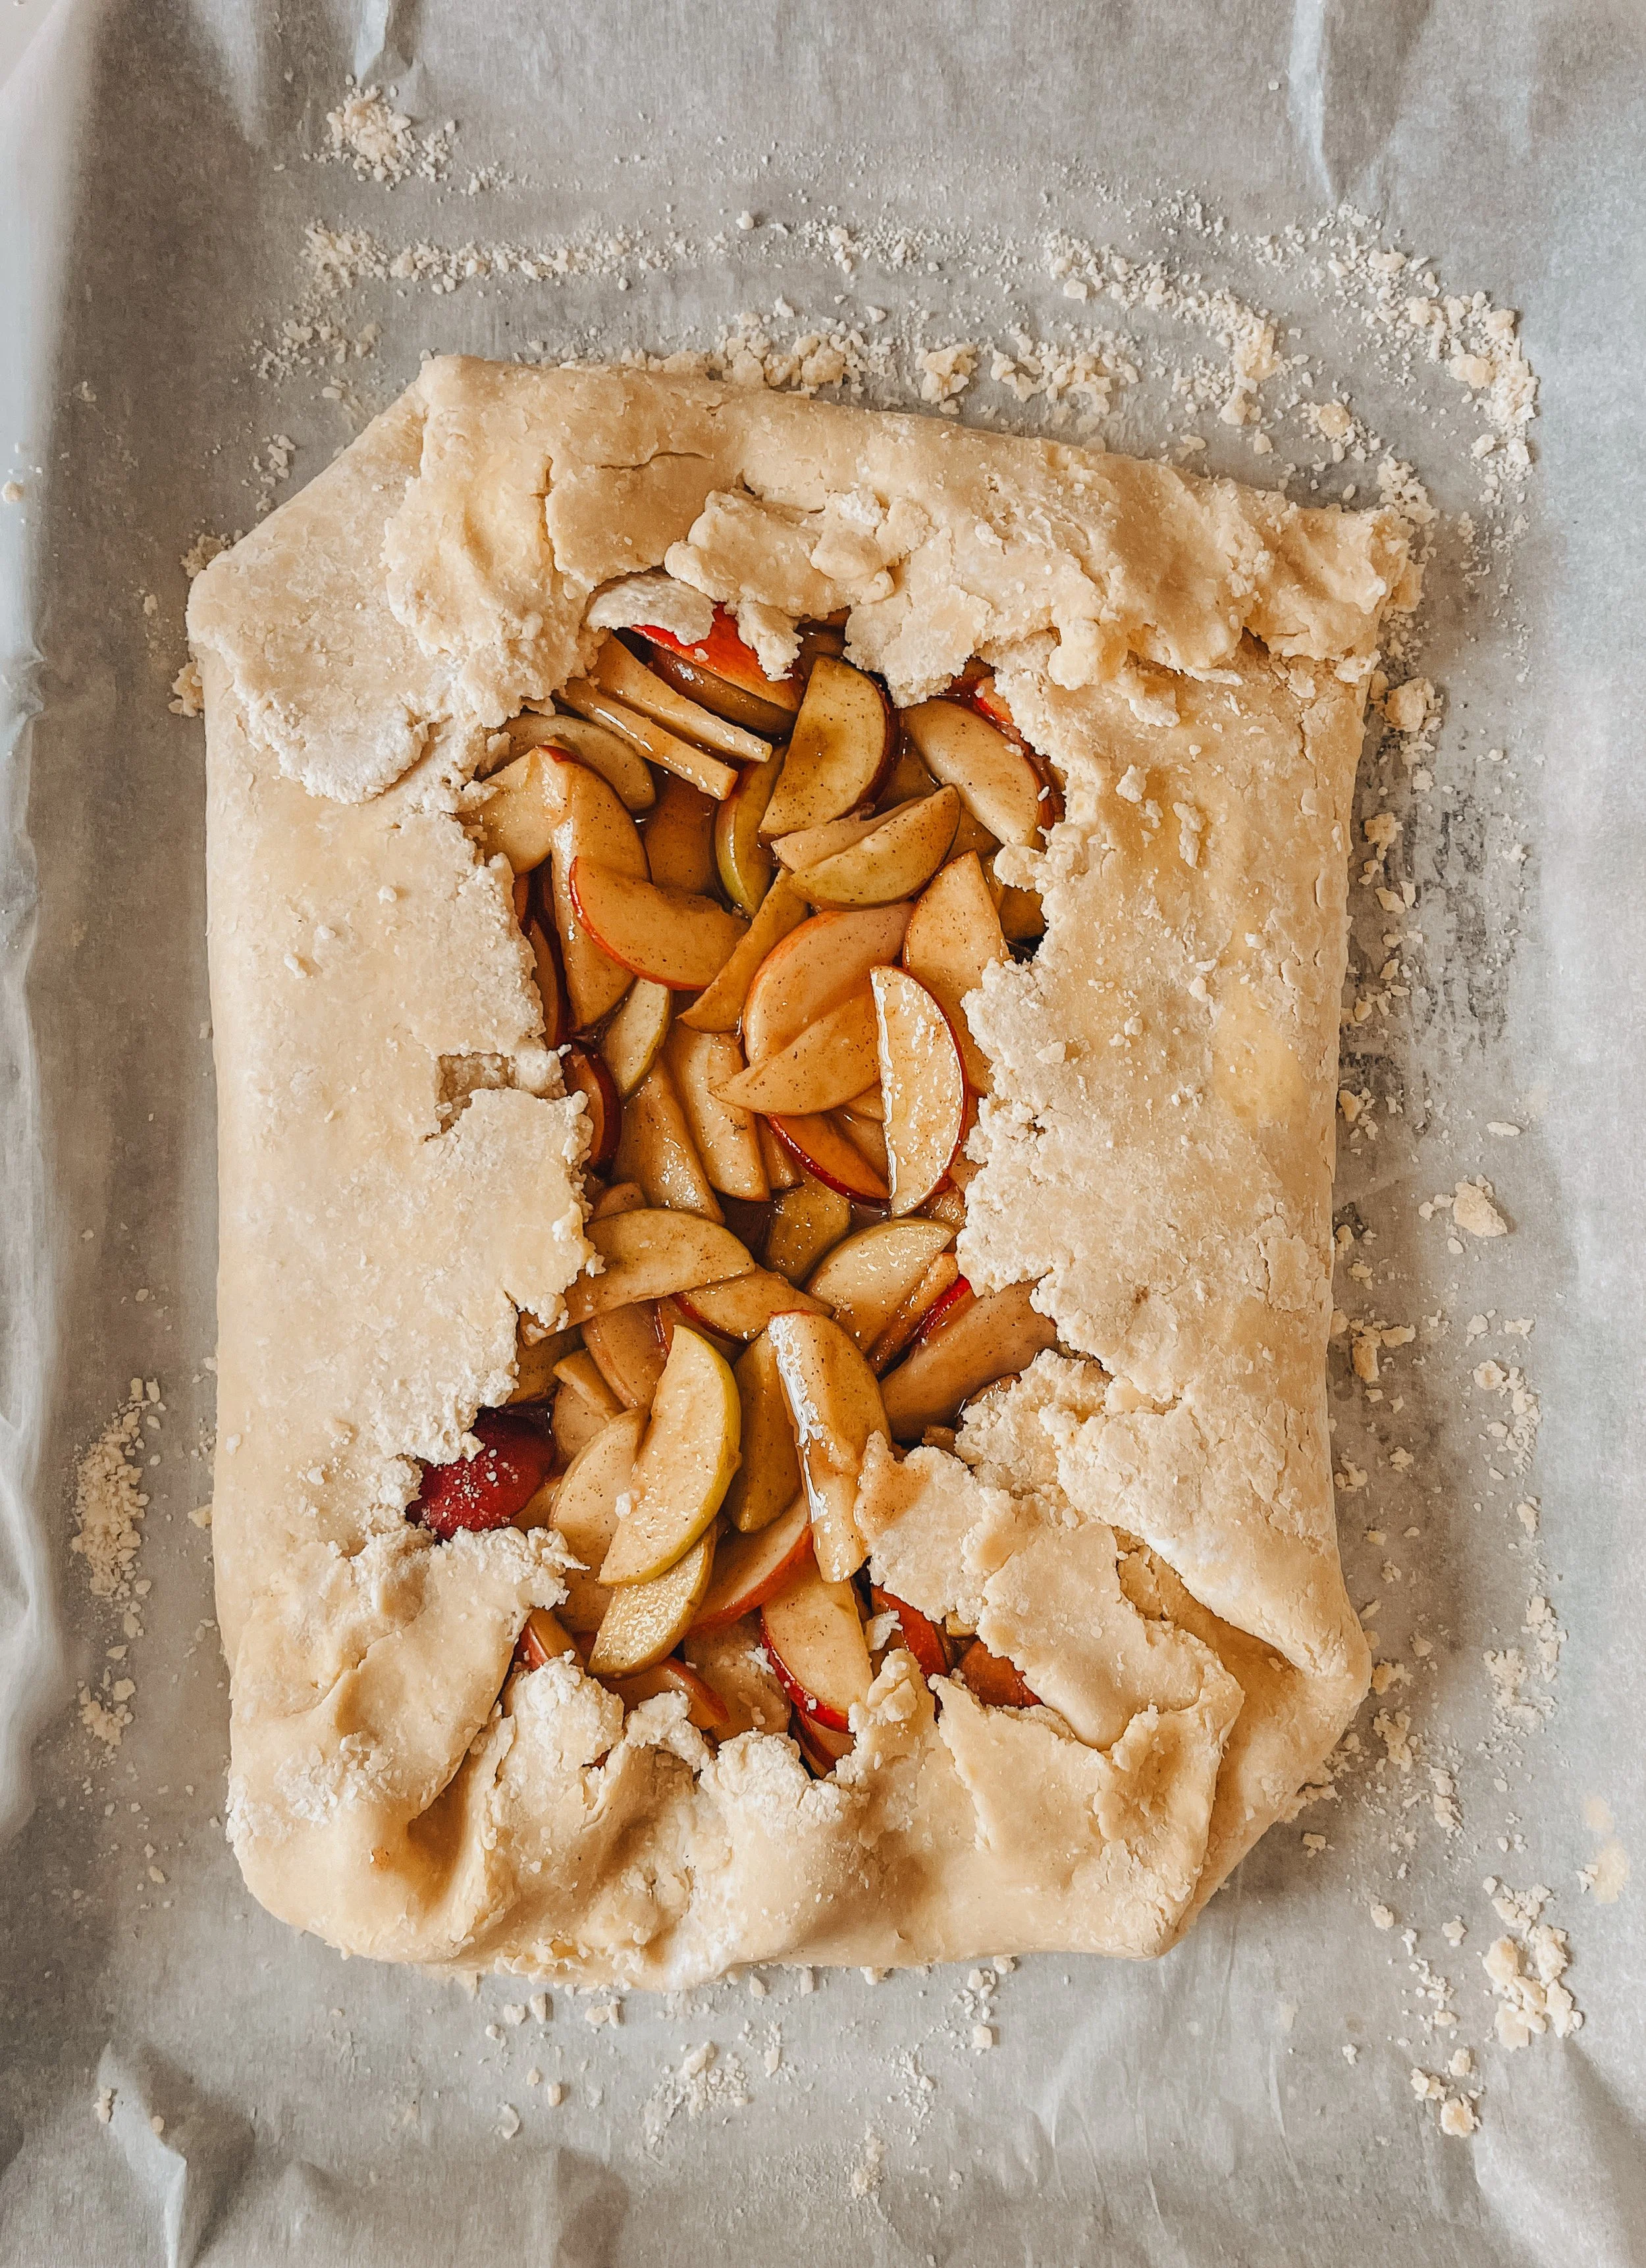
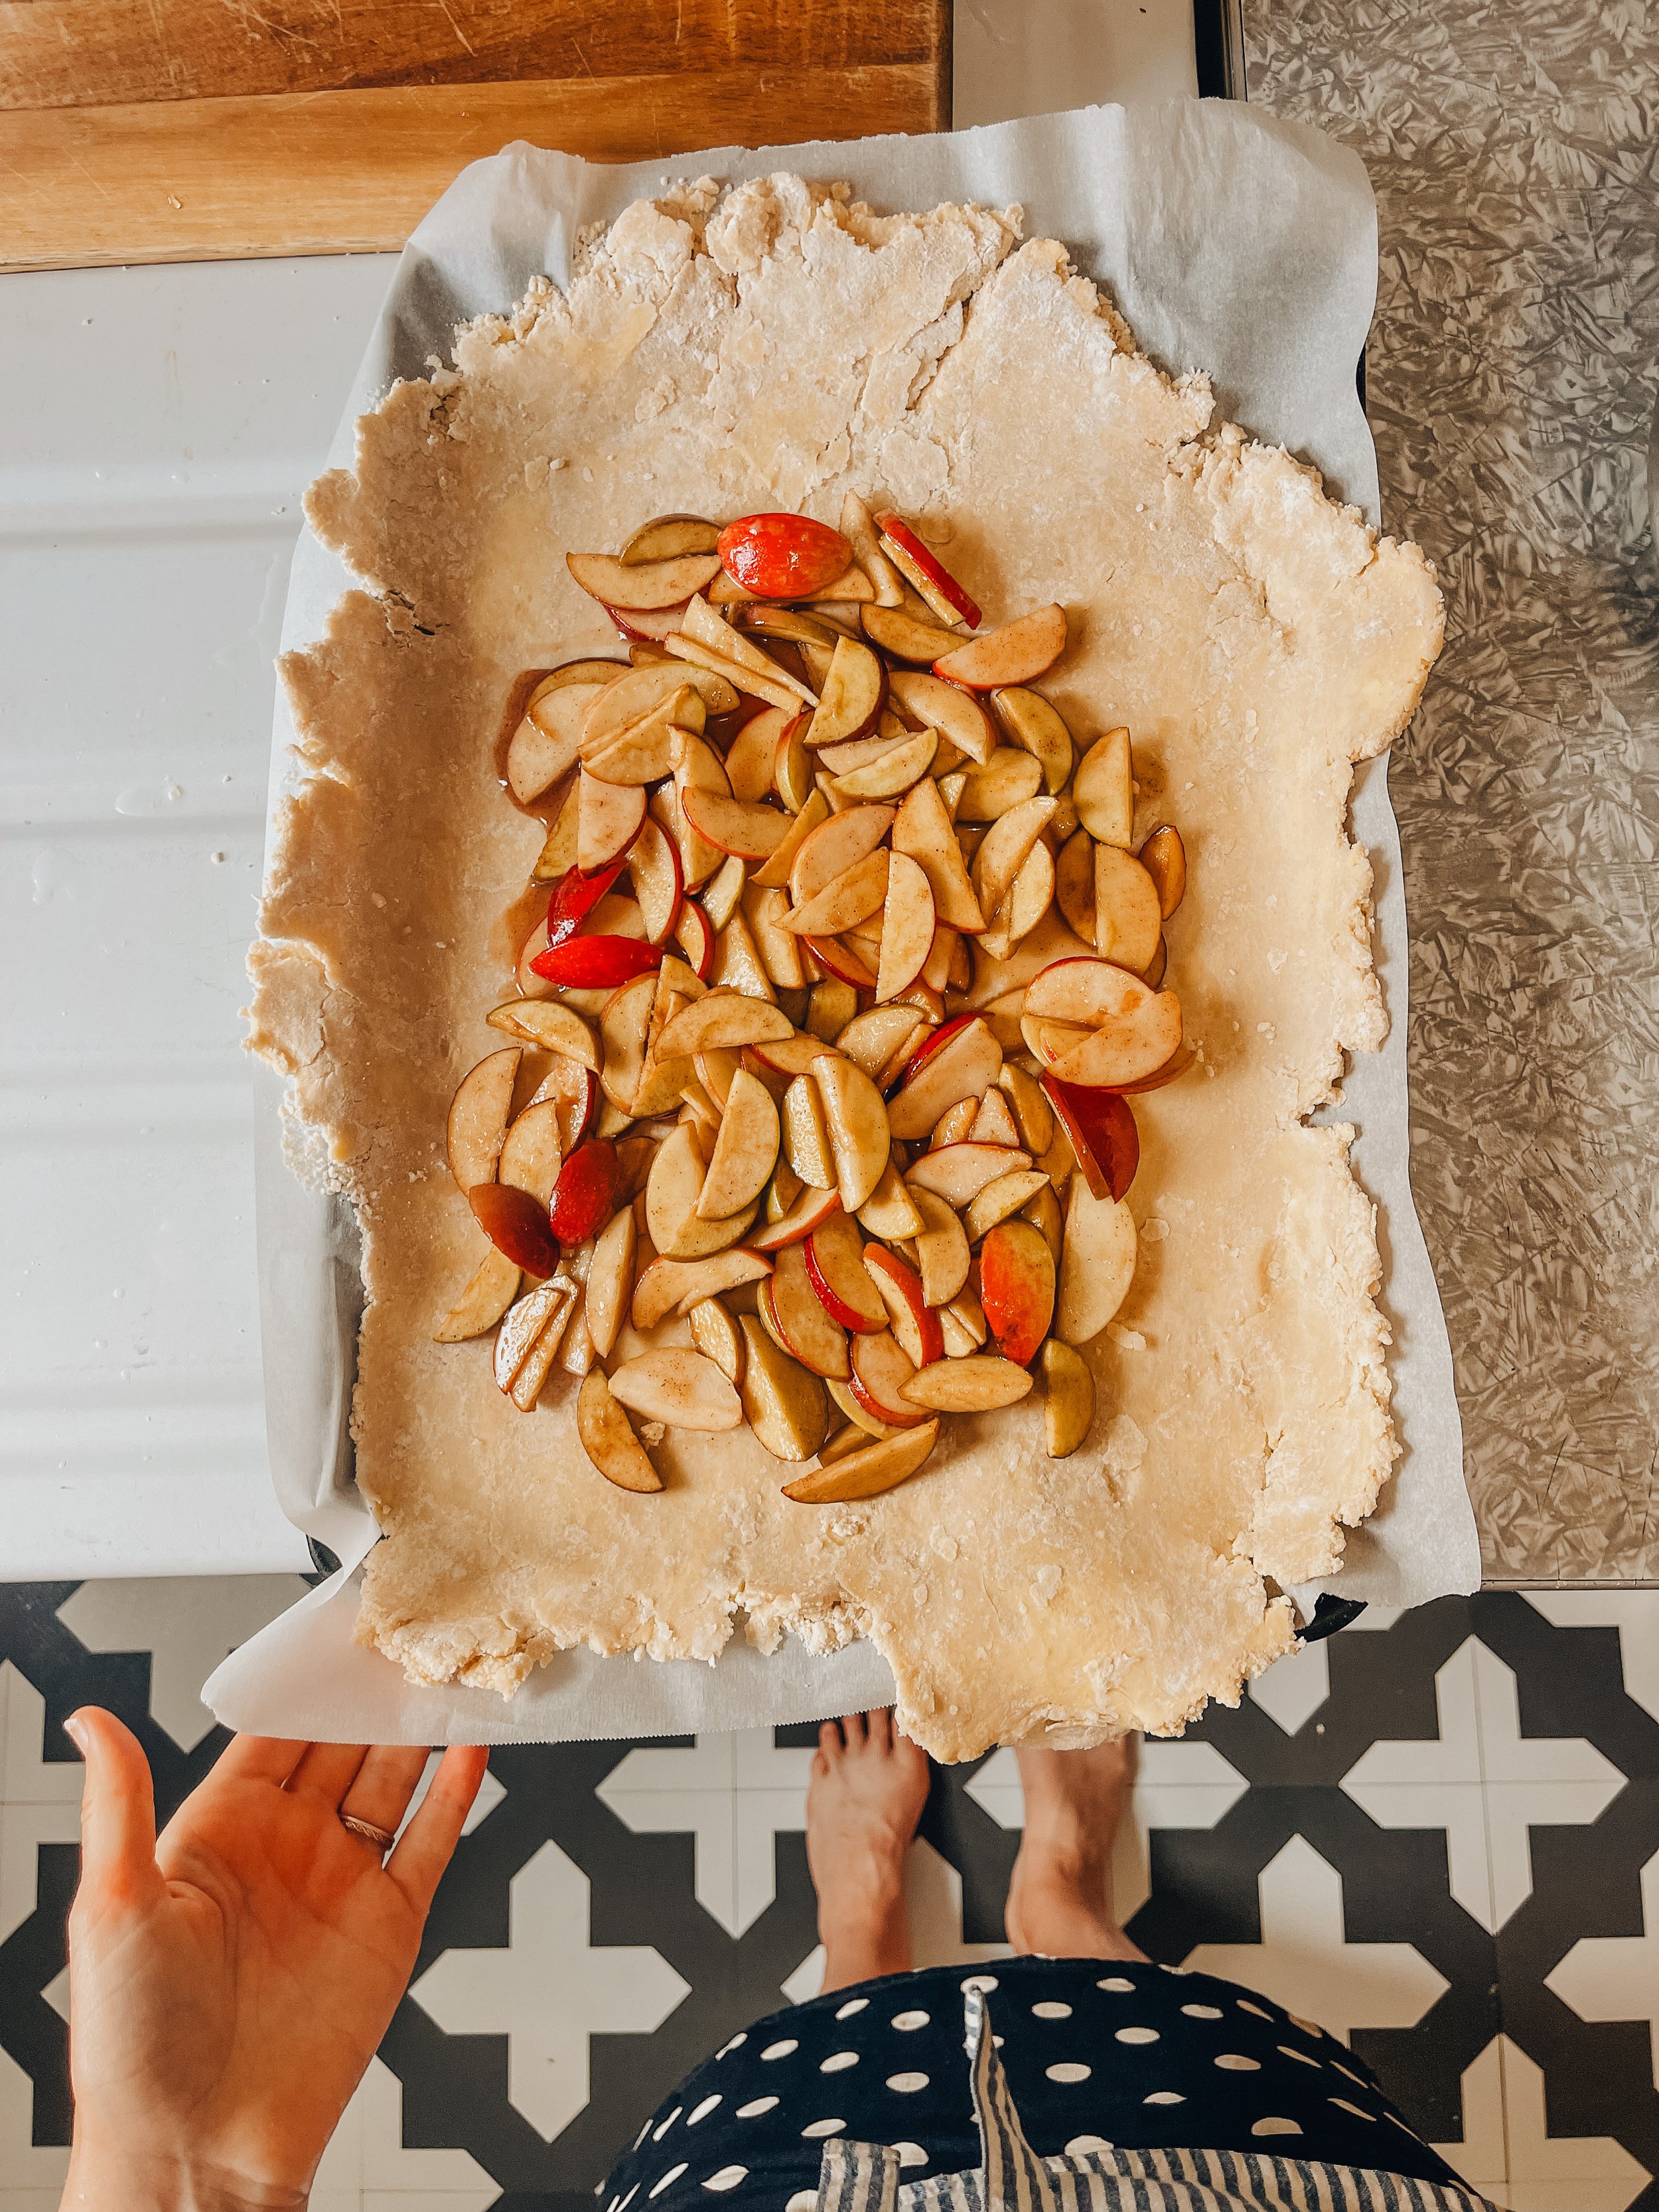
  8. Transfer the apples to the dough leaving behind any of the juices for now. Drape the excess dough over the filling covering the apples by 1 1/2 to 2 inches on all sides and tuck the corners together nicely. Now you can pour the juices remaining from the bottom of the apple mixture bowl onto the apples that are on the dough (now that everything is sealed and you risk losing less juices out the side of the pastry.)

  9. Whisk the egg with a teaspoon of water and use it to brush the exposed crust. Sprinkle with turbinado sugar.

  10. Place galette and bake until the crust is deeply golden brown the apples are tender, and the juices are bubbling and thickened, 45 minutes

  11. Remove galette from the oven and let cool completely before slicing and eating.

In Food: More Sweet Things
Comment
← Newer Posts Older Posts →
 

Hi! I’m Jenna — a creator, photographer, foodie, + travel enthusiast trying to bring some light and joy to this space! Welcome to my little corner of the internet where I share all things food + travel. Pour yourself a cup of coffee and take a look around!

GET ON THE LIST

Stay in the know! Sign up to be notified of new posts + get email exclusive content!

Your inbox will thank you.

Thank you!
To give Thanksgiving the respect it deserves I&rsquo;ll keep the recipe for these slightly more Christmas-y cookies on lock down a week longer, but after that it&rsquo;s free game. 🍪
If you&rsquo;d like the recipe for these Rosemary Brown Butter Ch
A GIANT PUMPKIN POP TART WITH A BROWN SUGAR ICING is live on the blog! ✨

With Thanksgiving arriving in less than 2 weeks I&rsquo;ve been dreaming up a dessert that feels like a good balance of both fun and tradition. This giant pumpkin pop tart brin
I had the best weekend eating (+ drinking) my way around Chicago! ✨ It always makes me so happy to be back in this city that grew me so much in my early 20&rsquo;s &mdash; what a privileged to return and reflect on the ways I&rsquo;ve grown and chang
NEW BLOG POST: Our favorite coffee, food, + sights in Omaha, Nebraska. 

There are truly so many places we love in Omaha! After living here for 6 years it felt like time to round up our top picks and share it with all of you. Hop over to the blog to
Fall in the neighborhood. ✨
Broccoli, couscous, pistachios, pumpkin seeds, + feta tossed with a lemon turmeric dressing for a nourishing lunch. ✨
A quick little 24 hour trip to hang with my mom. ❤️
Harissa chicken hummus plates ✨
Back on my Greek omelet kick! They&rsquo;ve been such a great breakfast that has felt both fresh and nutritious! 

I added Kalamata olives, tomatoes, mint, basil, and feta in this time, but it could easily maintain the Greek vibe with some red bell p