Hello hello!
Welcome to the start of a new week. Am I an insane person for saying I actually enjoy Mondays? I mean, I can comfortably say that I am an insane person, but whether or not that's solely related to my being okay with Mondays, not sure. I'll get back to you on that one.
Most of the time a new week leaves me feeling inspired and motivated for all of the potential that lies ahead. This week Josiah and I have the entire week to work on our camper renovation. Up until now we've just been working on it here and there, getting things accomplished as we had time, BUT this week it's going to be all about the camper. I'm trying to manage my expectations though because the amount of things I think we can accomplish in a day are generally way more than is possible. Josiah will be there to help keep me in check. And these snickerdoodle bites will be here to keep me from having a hangry meltdown between Home Depot runs. They're full of fats and nutritious enough to justify as a snack, but sweet enough to satisfy a sweet craving. All wins in my book. Make them up today and have them on hand all week!


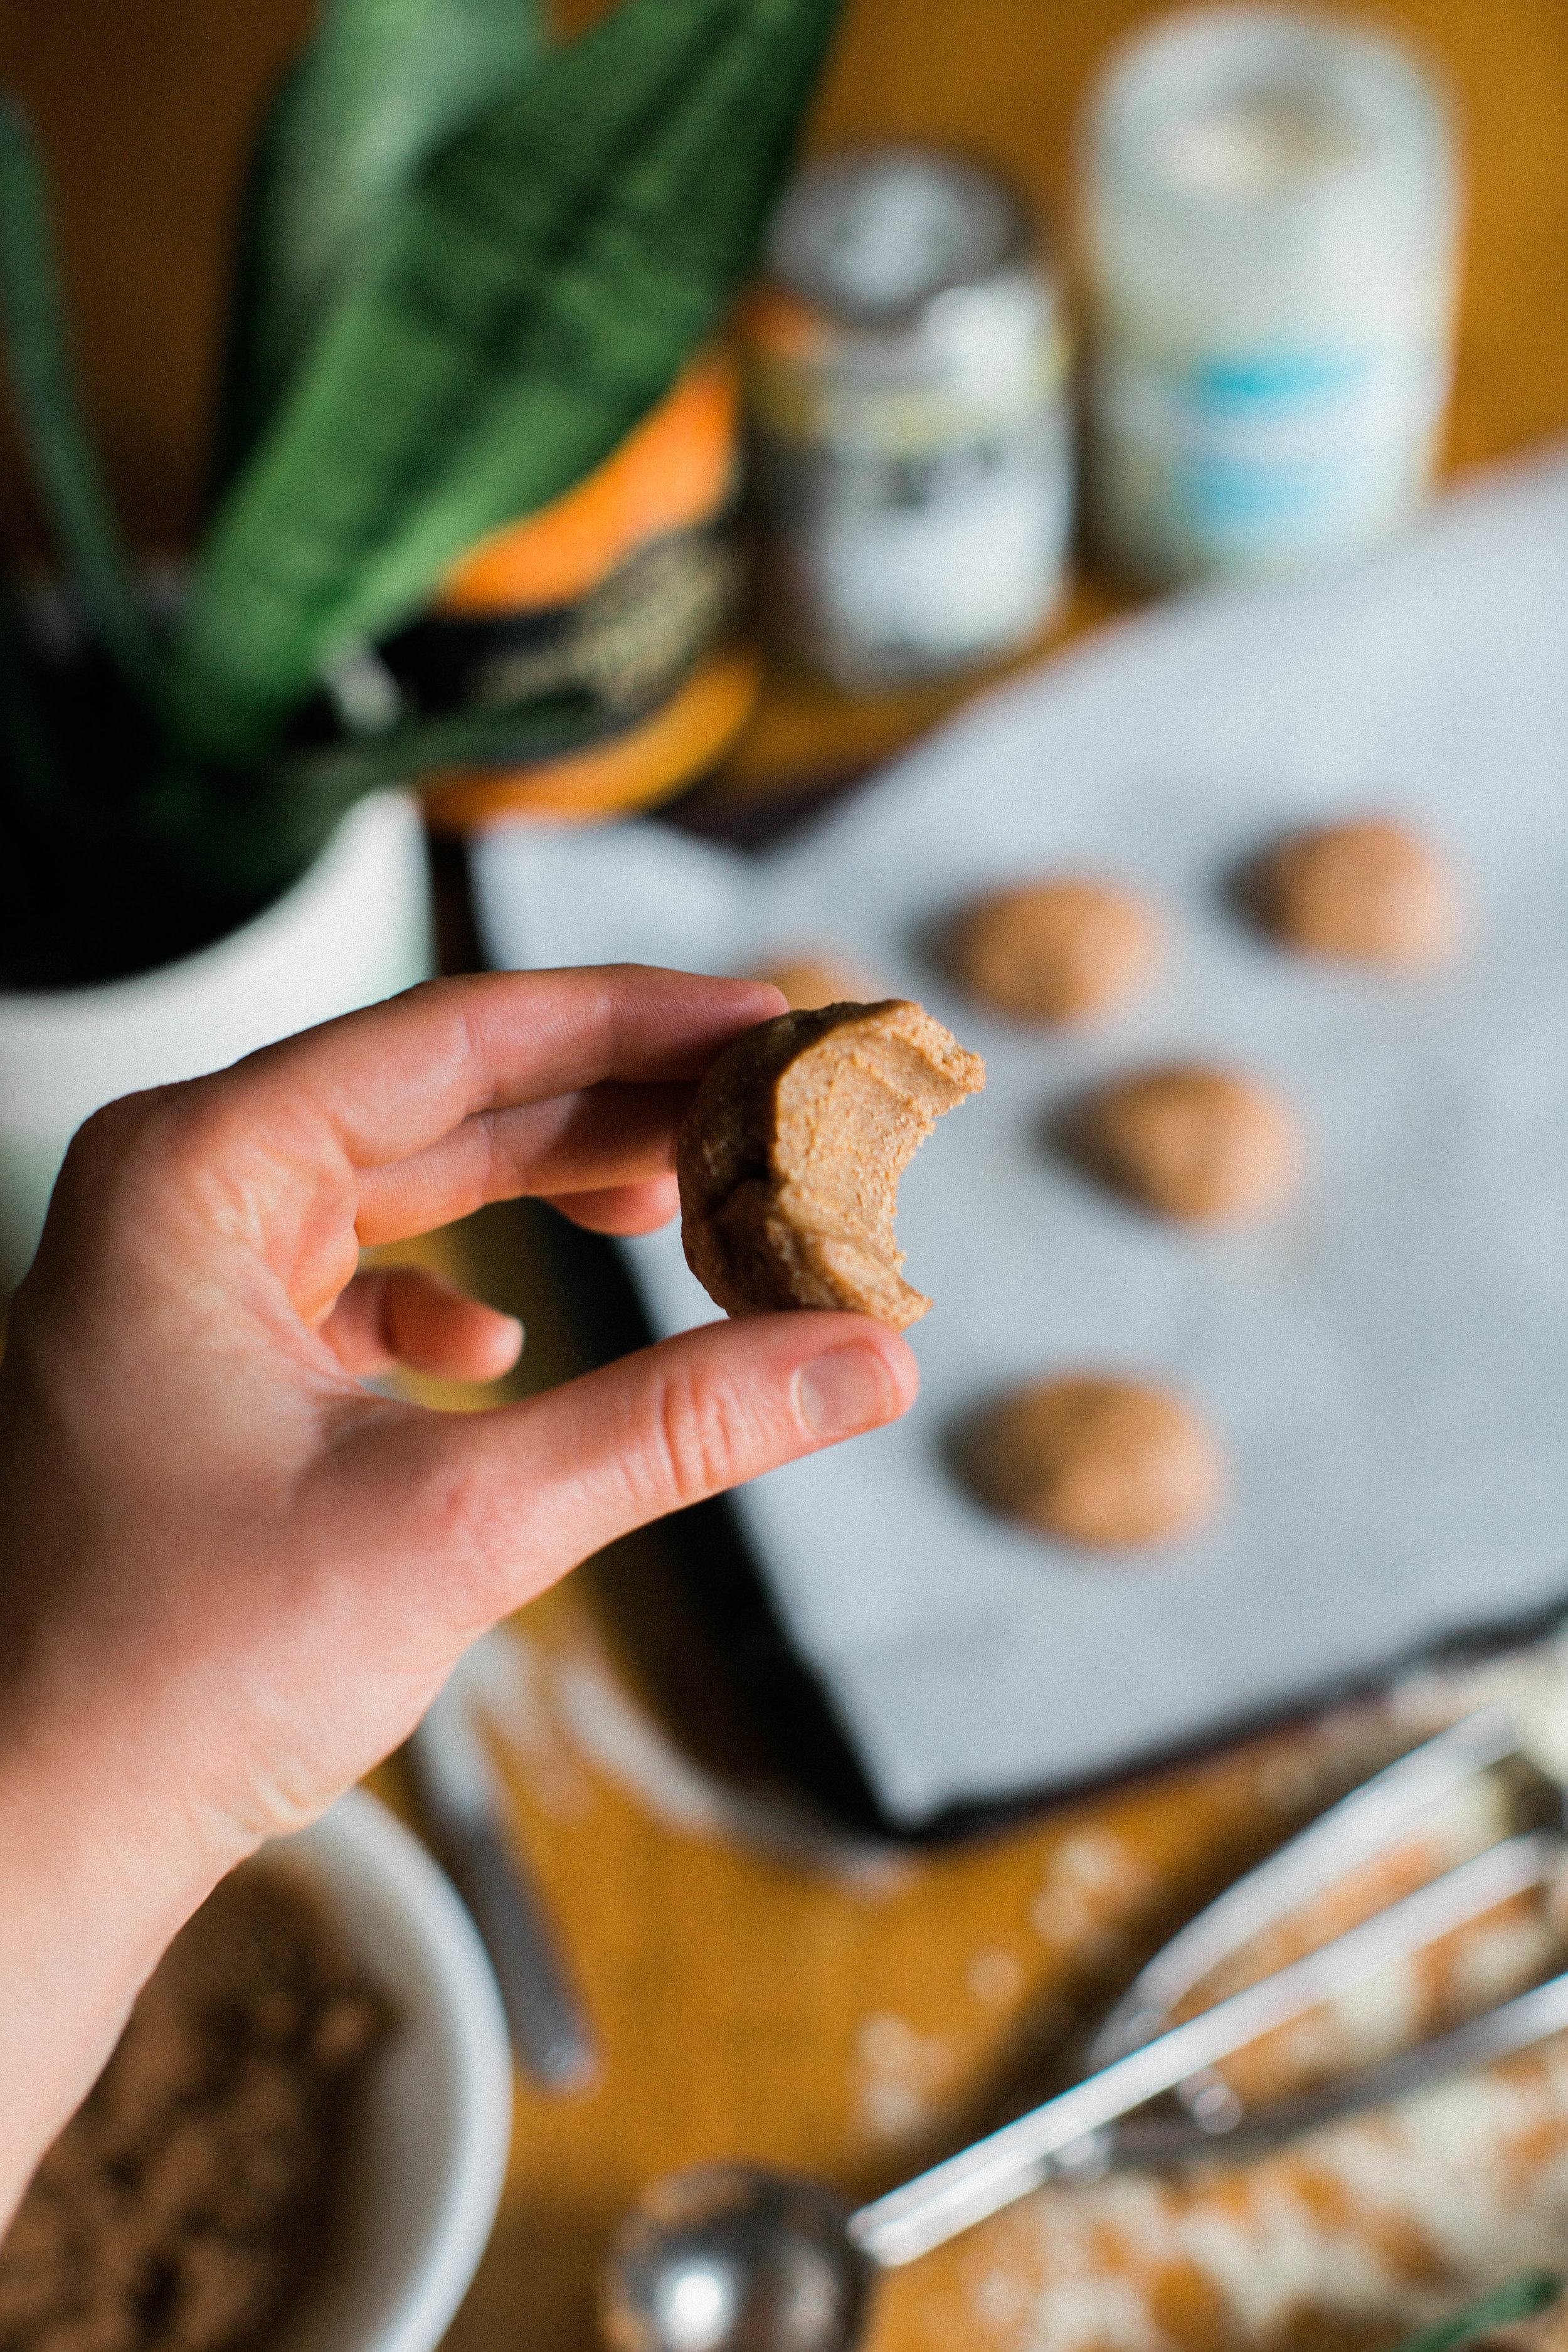
Snickerdoodle Bliss Bites
Makes: 10
- 3 tablespoons coconut butter
- 2 tablespoons ghee, melted and cooled
- 3 tablespoons coconut oil, melted and cooled
- 1 teaspoon vanilla
- 2 scoops collagen
- 1 1/2 teaspoons cinnamon
- 1 cup almond flour
- 2 teaspoons maca, I used Trader Joe's
- a pinch of salt
Combine the coconut butter, ghee, coconut oil, and vanilla in a medium sized bowl. Mix the collagen, almond flour, maca, and salt in another bowl. Slowly add in the dry mixture to the wet. Scoop the mixture into 1" balls and place onto a baking sheet covered in parchment paper. Place the bites into the freezer for approximately 20 minutes or until the bites feel firm. As soon as the bites feel firm, enjoy! Store in the freezer.