• blog
  • about
  • Email List
  • Archives
Menu

HAZEL HAUS

Street Address
the best things in life are edible
Phone Number
A Food + Travel Blog

Your Custom Text Here

HAZEL HAUS

  • blog
  • about
  • Email List
  • Archives

DIY Coconut Kefir + Coconut Kefir Parfaits

February 19, 2018 Jenna Hazel
jennahazelphotography-coconut-kefir-0518.jpg

I have a confession, I suck at DIYs. Like, I'm awful at them. The best example perhaps of my DIY fails, that was essentially a fail from the moment I dreamed up the idea, was the time I painted a couch. You read that right, I painted a couch. Or at least attempted to paint a couch. Josiah and I had just gotten married and inherited my parent's old couch and love seat that were not the prettiest of colors. 

So I decided to paint them. Most sane people would have maybe thought of the idea and then let it float away with the rest of the idea that you know are just bad. Me on the other hand, I thought of this idea and held onto it for dear life. In fact, at the time I didn't know if I could have had any ideas that were quite as amazing as this. Like, it was just the best. It was going to be cheap and I was going to get a beautiful black couch of my dreams. Did I mention it was going to be cheap? 

Well after buying about $170 worth of paint we ended up with some splotchy, crunchy-feeling seating in our tiny living room. Maybe not my best idea. Since then there have been a series of DIY fails that I've gone into so eagerly and fallen so flat on my face. 

Moral of the story, I'm not great at DIYs. I tell you this so that you know that if I can make this DIY coconut kefir, anyone can. 

Let's talk a little bit about why kefir is important. Kefir is a fermented drink that is similar to yogurt. It's made using cultures of yeast and lactic acid bacteria and it is super good for your gut. We all have probably been told that yogurt is good for our gut, but kefir is especially good for you because it includes a wide variety of bacteria strains. Yogurt on the other hand only contains a few. 

So not that long ago, because I don't tolerate dairy well, I hadn't really tried kefir before. I knew there were benefits to drinking it, but I just assumed because I didn't eat dairy, those benefits wouldn't be available to me. However, after a conversation with my friend Kate I was introduced to the idea of making a non-dairy version of kefir at home. She sent me the link to the kefir starter and in no time I had the most creamy, dreamy, tangy, and irresistible jar of coconut kefir. The fact that it's super good for me is really just a bonus. I would drink this stuff whether it was helping support my GI tract or not. So thank you, kate, for your wisdom. 

A few things to note when making this recipe. I was not successful with ALL coconut milk. If your coconut milk is watery or just all around not thick, the kefir will still do it's thing, but you'll end up with a much chunkier and less appetizing result that separates in the fridge. The coconut milk that I have found works the best is the Whole Foods brand. However, I do think as long as you are conscious of choosing a coconut milk that is legitimately thick, you'll be golden. 

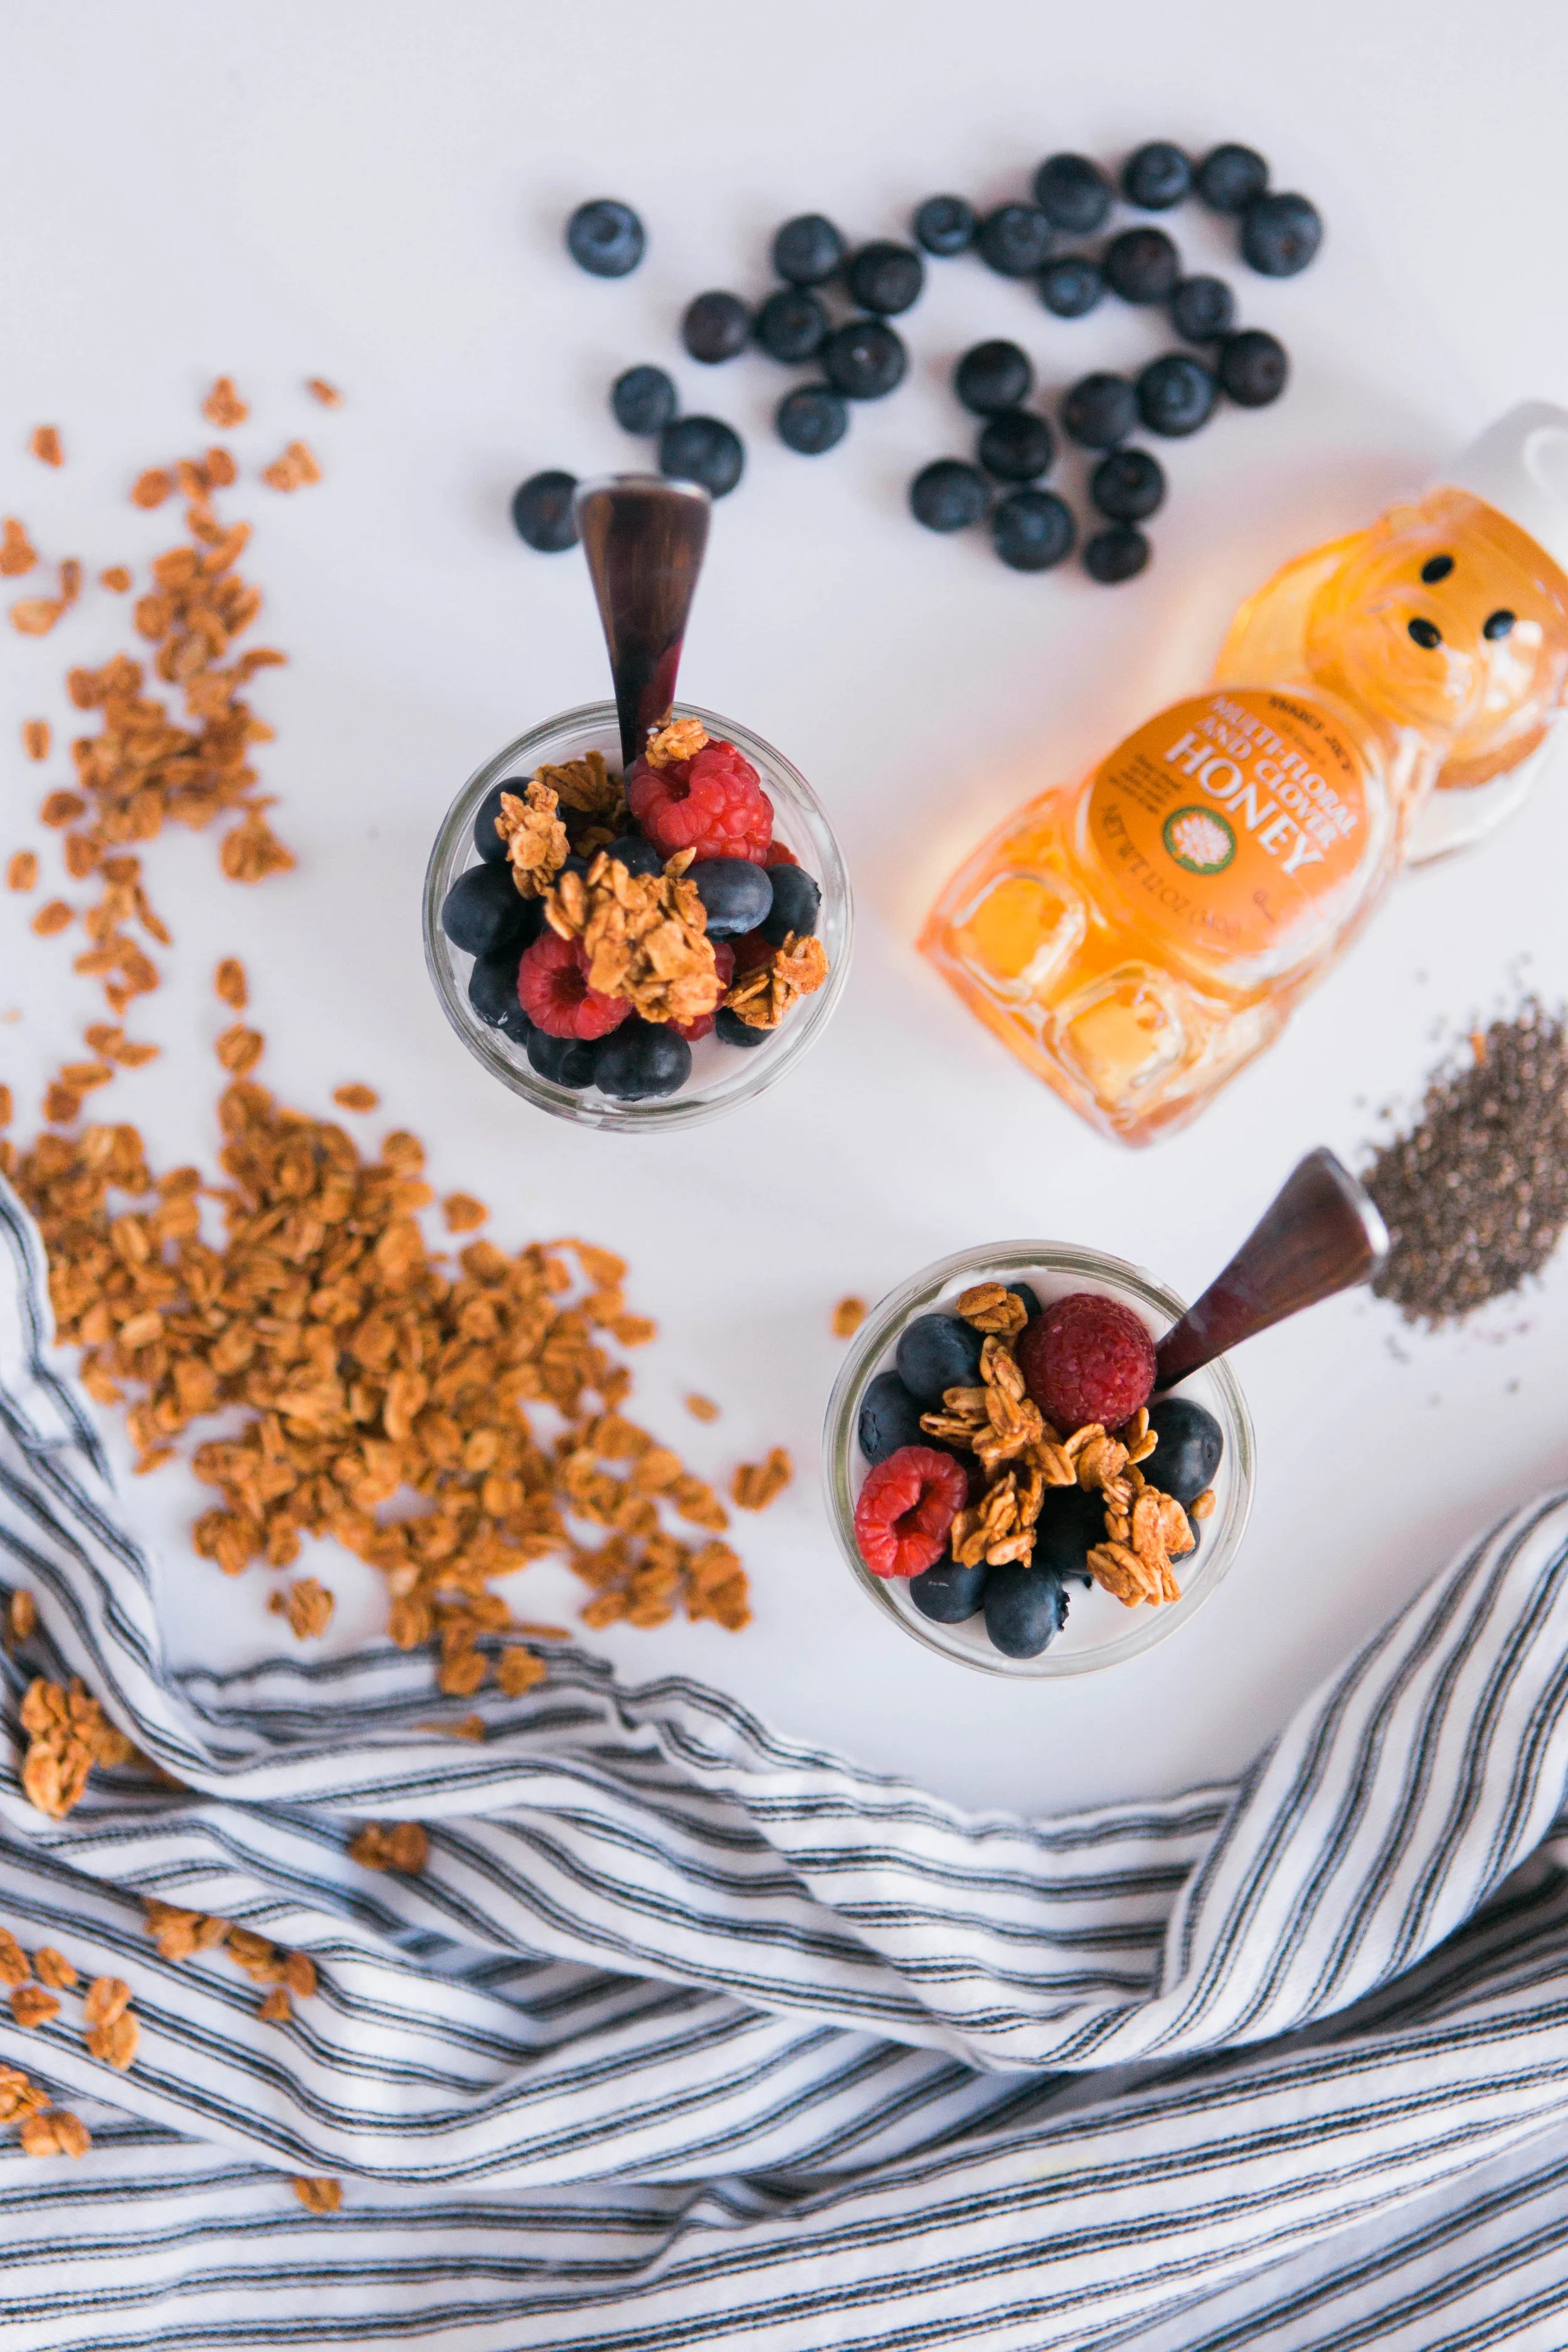
This recipe could not be easier. Like You combine two ingredients and then leave them to do their thing for 24-48 hours and then BAM, you have a good-for-you base for a super yummy snack. I am totally cool with drinking this stuff straight up or spooning it straight from the jar, but I also think it's extra magical with some berries and granola added. I hope that you enjoy this recipe and feel super good about yourself for totally nailing a DIY project that looks fancy, but requires minimal work. 

jennahazelphotography-coconut-kefir-0491.jpg
jennahazelphotography-coconut-kefir-0498.jpg
jennahazelphotography-coconut-kefir-0494.jpg
jennahazelphotography-coconut-kefir-0504.jpg
jennahazelphotography-coconut-kefir-0501.jpg
jennahazelphotography-coconut-kefir-0508.jpg
jennahazelphotography-coconut-kefir-0514.jpg
jennahazelphotography-coconut-kefir-0511.jpg
jennahazelphotography-coconut-kefir-0519.jpg
jennahazelphotography-coconut-kefir-0521.jpg
jennahazelphotography-coconut-kefir-0522.jpg
jennahazelphotography-coconut-kefir-0524.jpg
jennahazelphotography-coconut-kefir-0528.jpg
jennahazelphotography-coconut-kefir-0525.jpg
jennahazelphotography-coconut-kefir-0532.jpg
jennahazelphotography-coconut-kefir-0529.jpg
jennahazelphotography-coconut-kefir-0533.jpg

Coconut Kefir 

  • 1 can of coconut milk (14 ounces)*
  • 1 packet of the kefir starter

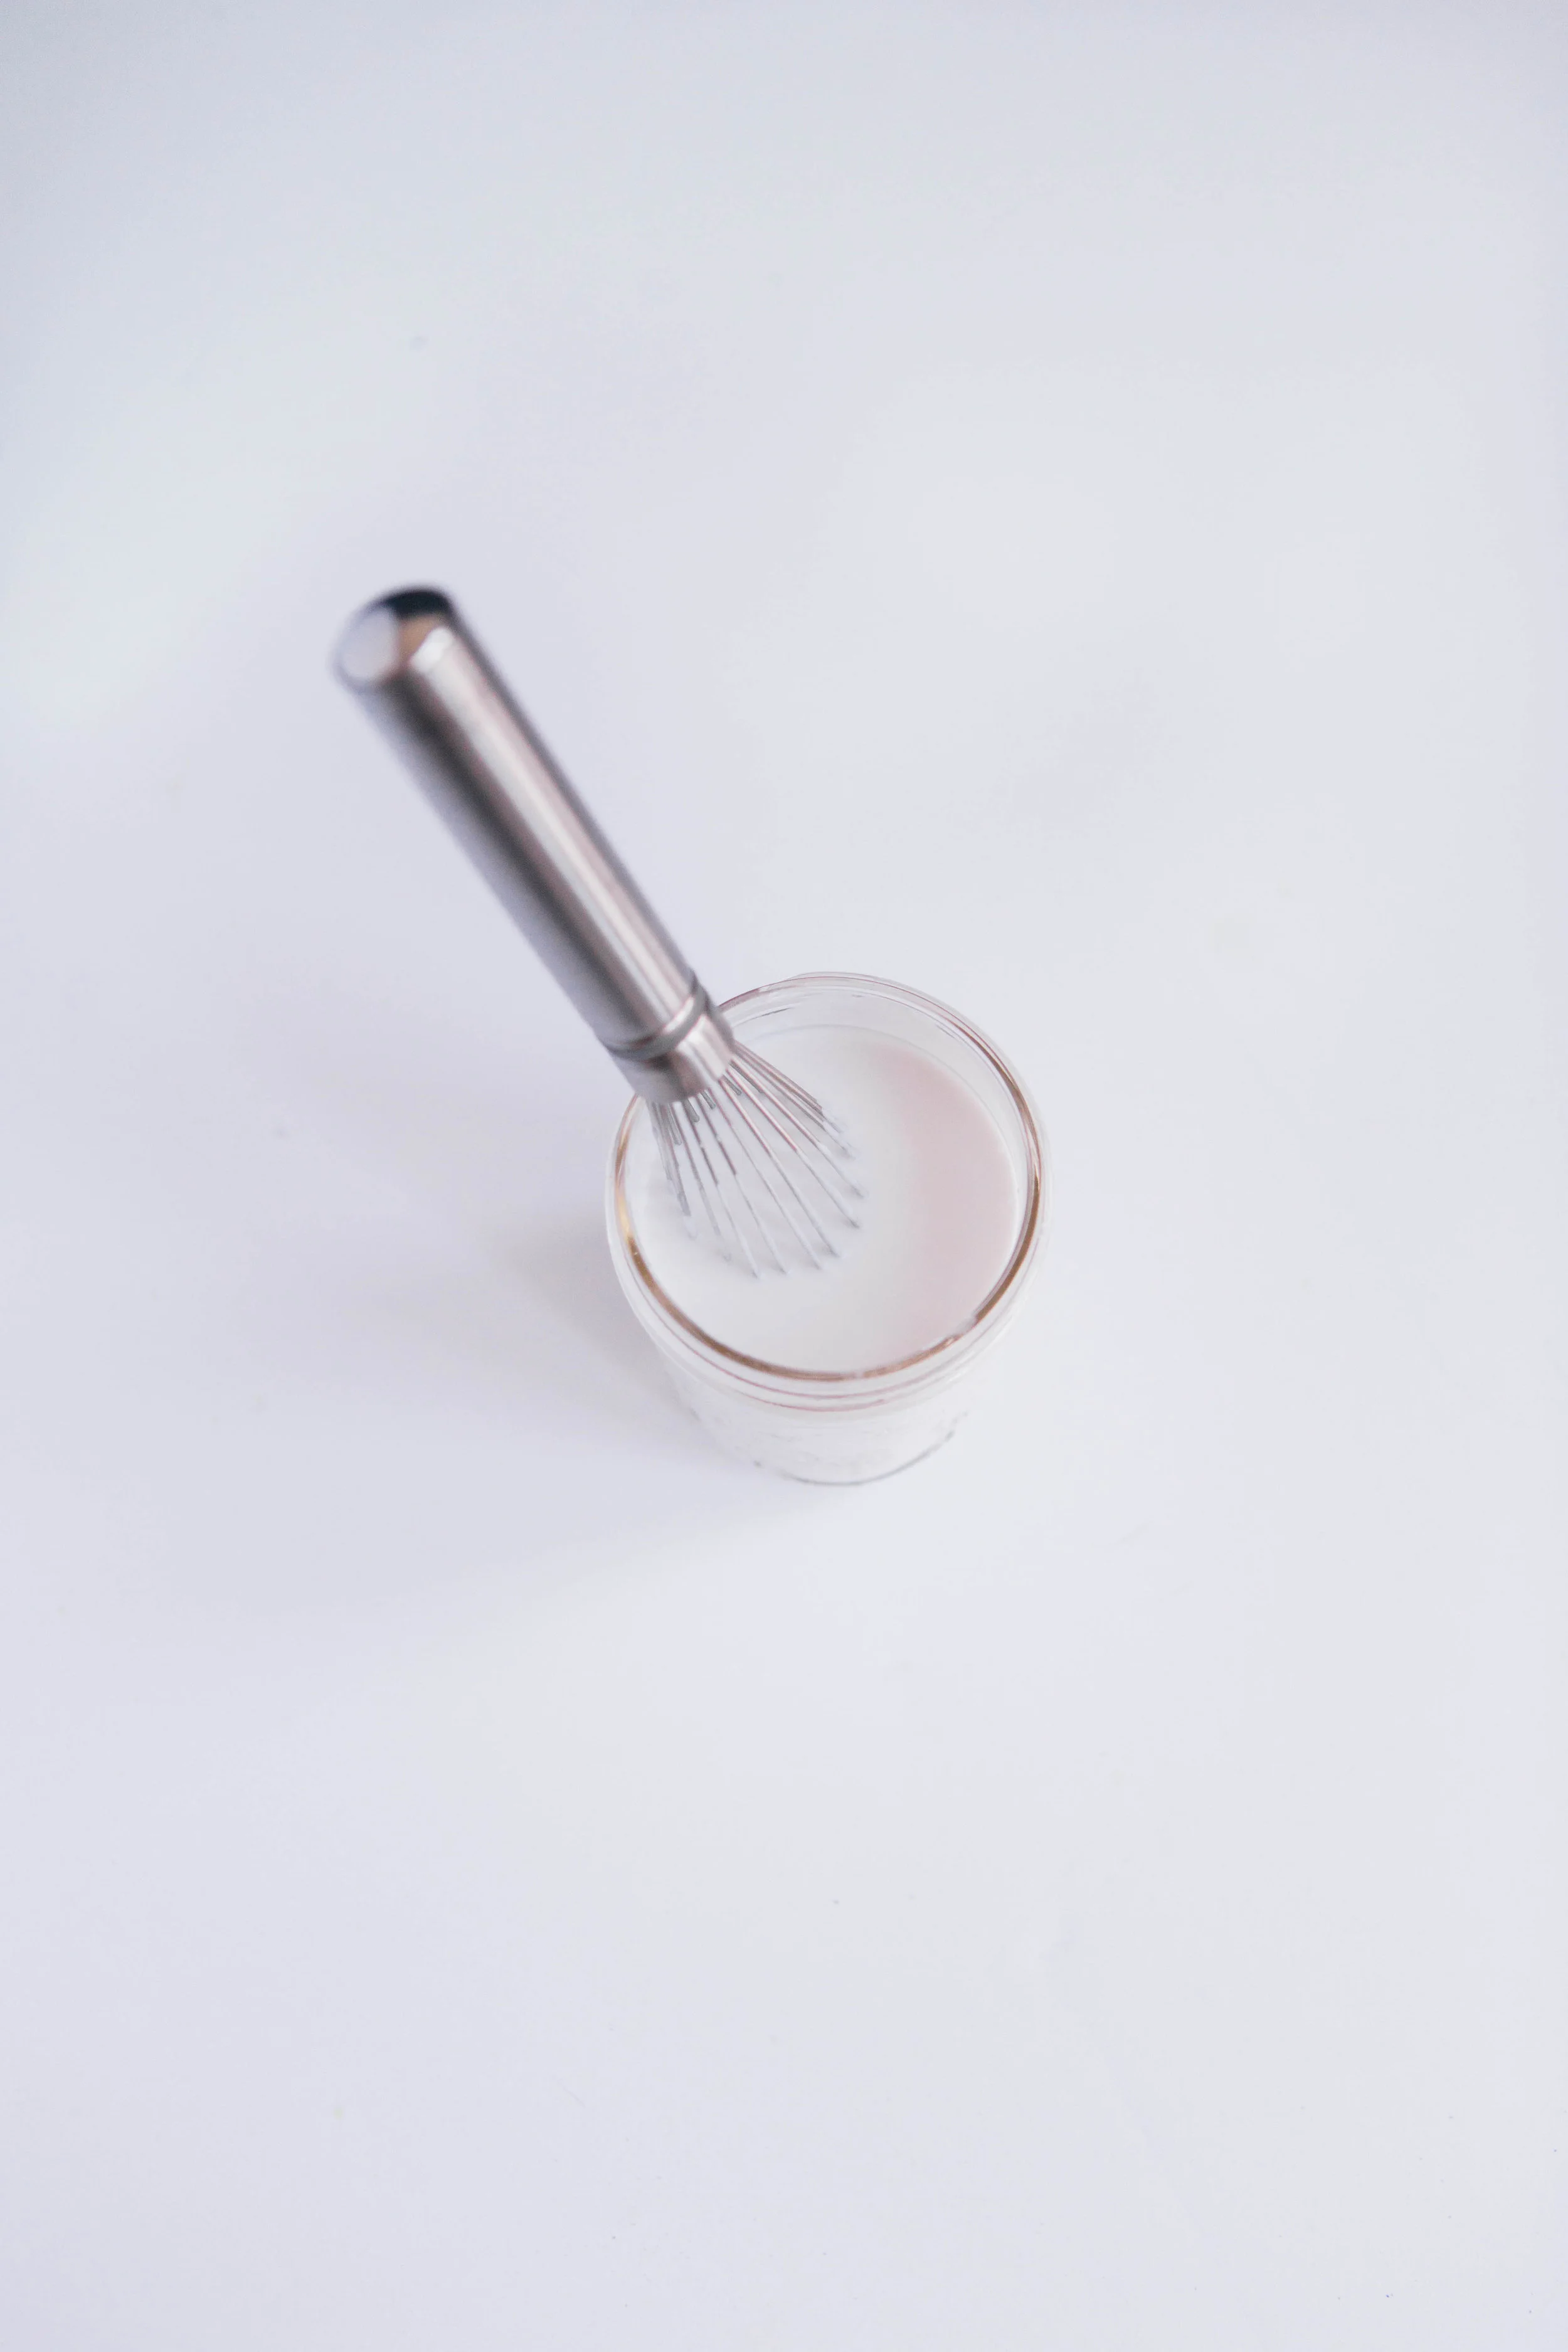
Combine the coconut milk and kefir starter in a mason jar using a whisk. Place a paper towel, cheesecloth, or thin dish towel over the mason jar and set it in a place at room temerature that it will not be disturbed for 24-48 hours. I put mine on our refrigerator. The amount of time you leave your kefir to hang out depends on how tangy you want it. The longer you let it set, the tangier it will be. I usually aim for close to 48 hours because I like it really tangy. If you prefer a more mild flavor, call it good at 24. Once the kefir has reached the level of tang you want, cover it with a lid and store it in the fridge for up to 3 weeks. 

*Using thick coconut milk such as the Whole Foods brand pictured above is critical to the texture of this turning out creamy and delicious. I've found that Trader Joe's coconut milk does NOT work, so I would not recommend using it or other coconut milks that have similar consistencies.

Coconut Kefir Parfaits

Makes 2 

  • 1 cup coconut kefir
  • 1/2 cup fresh blueberries
  • 1/2 cup fresh raspberries 
  • 1/2 cup gluten-free or paleo granola 
  • a drizzle of honey (optional) 

Alternate layering the coconut, blueberries, and raspberries into two small mason jar or bowl. Top with granola and if you're feelin' extra, drizzle some honey. 

jennahazelphotography-coconut-kefir-0527.jpg
post signature.jpeg
In Food: Snacks
Comment

Golden Butternut Squash Soup with Roasted Butternut Squash Seeds

February 15, 2018 Jenna Hazel
jennahazelphotography-golden-butternut-squash-soup-0465.jpg

This recipe was created in partnership with Imperfect Produce and featured first over here , but I couldn't resist sharing it with you all too. This year Imperfect produce is leading the campaign #newyearnewwaste and couldn't feel more honored to be inspiring others in a movement I believe so much in. There are so many simple ways to reduce waste. One way is using as many parts of a vegetable as possible. How many times have you used a butternut squash and then just tossed the seeds? I am so guilty of this. It is so, so easy to toss the seeds in oil, sprinkle a little salt, and roast that I don't know why I haven't been doing it forever. In this recipe I used the seeds to add some texture and interest to the soup, but if that's not your thing you can still roast the seeds and eat them straight up or use as a salad topping. Whichever way you decide to consume them, you'll still be reducing waste and that is a pretty freaking awesome thing. 

jennahazelphotography-golden-butternut-squash-soup-0433.jpg
jennahazelphotography-golden-butternut-squash-soup-0440.jpg
jennahazelphotography-golden-butternut-squash-soup-0442.jpg
jennahazelphotography-golden-butternut-squash-soup-0451.jpg
jennahazelphotography-golden-butternut-squash-soup-0457.jpg
jennahazelphotography-golden-butternut-squash-soup-0453.jpg
jennahazelphotography-golden-butternut-squash-soup-0468.jpg
jennahazelphotography-golden-butternut-squash-soup-0467.jpg
jennahazelphotography-golden-butternut-squash-soup-0471.jpg
jennahazelphotography-golden-butternut-squash-soup-0462.jpg

Golden Butternut Squash Soup

Serves 2  

  • 1 medium butternut squash, seeds and all 
  • 1 1/2 teaspoon coconut oil 
  • 1 can coconut milk (14oz can) 
  • 1 teaspoon turmeric 
  • 1/4 teaspoon garlic 
  • 1/4 teaspoon sea salt 

Preheat Oven to 350 degrees. Cut the butternut squash in half length-wise and scoop out the seeds. Set the seeds aside. Using a pastry brush spread the teaspoon of coconut oil onto the butternut squash halves and then sprinkle the butternut squash with the sea salt. Place the butternut squash halves cut side down and bake in the oven for one hour or until you can carefully remove the skin with a fork. 

While the butternut squash is roasting, rinse the seeds. While you are rinsing remove any stringy squash pieces until all that remains are seeds. Transfer the seeds to a kitchen towel and pat dry. Place the seeds in a medium bowl and toss with 1/2 teaspoon of coconut oil and then sprinkle with salt. Spread out in an even layer on a baking sheet. Turn the oven down to 275 and allow the seeds to roast for 15 minutes or until they begin to pop. Once they are done, set aside.  

Transfer the butternut squash to a food processor and combine it with the coconut milk, turmeric, garlic, and salt. Once combined, transfer to a sauce pan and heat to your satisfaction. Serve in two soup bowls, top with the seeds and enjoy. 

jennahazelphotography-golden-butternut-squash-soup-0465.jpg
post signature.jpeg
In Food: Soups + Salads
Comment

January Sugar Detox Diaries (week 4)

February 1, 2018 Jenna Hazel
IMG_8194.JPG

We made it! In so many ways this journey was much harder than I expected. However, in other ways it wasn't nearly as difficult. Finding meal ideas that excited me and kept things interesting was definitely not as challenging as I anticipated. I also was surprised how easy it was to to stick to my plan while I was traveling. I was surprised though by the amount of times I craved desserts. I would have thought that by day 30 I wouldn't even be thinking about sugar anymore, but last night I was dreaming about a brownie. That could have been in part because I knew the detox was coming to a close and I was so close I could almost taste it. However, my cravings were not constant or really that frequent overall (thank goodness!). I found them mostly to happen at night, just before bed. During the day I didn't even think about sugar, which surprised me! 

Now that I can officially say I've completed the Whole30 and sugar detox, overall I do feel amazing! I really do! My skin is clearer, my mind is clearer, I have more energy, and I feel like I hae a pep in my step. I feel like my eyes were opened to the amount of sugar that is in everything (which is a lot!) and am ready to find a balanced way of eating that leaves room for the occasional treat. I gained everything I was hoping and more from this journey! Thank you so much for all of you that joined in on this with me! It was so fun to have a source of accountability and I look forward to continuing to connect. Here's a look into what I ate and how I was feeling during the last few days. 

How I'm Feeling

Day 22 - I packed a lunch today because I was going to be on the road most of the day. I felt super great that I stuck to eating my meal that I packed because a lot of times I've used the excuse that I'm too busy to stick to something so "extreme." 

Day 23 - I woke up with a major headache this morning. After I took some meds to helo with the headache I went on with my day. I spent a lot of time meal prepping today which was really nice. I might be in the minority, but I love meal prepping. I turn on some music and just kind of get in the zone. It's become a favorite ritual of mine. It felt good to get super organized in the kitchen again. I had some girlfriends over in the evening and we chatted over some tea. It was nice to hang out and spend time with them that did not revolve around food. 

Day 24 - I felt so great all day! I had a great workout, got a lot done, and even made it to a yoga class in the evening. Today I really started to feel like eating this way is super norma -- routine even. 

Day 25 - I felt fantastic all day!Josiah and I went to a free yoga class in the evening and then we made homemade smoothie bowls. It was so much fun. I had good energy all day and no cravings! 

Day 26 -  I’ve been up since 2am because I couldn't sleep. Bad idea. From 8am-12pm the day kind of crawled by. I wasn't sure if I should take a nap or just power through. I ended up powering through and going to Orange Theory to get in a good workout. I felt so much better after my workout! 

Day 27 - This was the busiest day ever. I'm actually surprised how easy it was to stay on track even though I was moving from one thing to the next. I think the key was planning! I brought snacks and planned out a few breaks where I could grab food from the house between meetings. Planning is definitely a lesson I will take with me in my life after whole30 and the sugar detox. 

Day 28  - I felt super great! I'm really noticing a difference in how my clothes feel and I am walking a little taller. I've also noticed that my workouts have been better! 

Day 29 - I felt great all day! Excited to be coming to the end and finding a healthy balance. I’m not sure if I’m more excited to have maple syrup on some Simple Mills pancakes or avocado toast on Ezekiel bread.  

Day 30 - It was so hard not to just throw caution to the wind and bake a batch of Simple Mills chocolate chip cookies or brownies. But overall I feel amazing! 

What I'm Eating  

FullSizeRender.jpg

sautéed cabbage with pork belly topped with sunny eggs 

FullSizeRender.jpg

mixed greens topped with leftover meatballs, sunflower seeds, a touch of mayo, and some Tessemae's green goddess dressing 

FullSizeRender.jpg

broccoli bacon salad, caramelized onion potatoes, and cranberry lemon tuna salad 

FullSizeRender.jpg

the cabbage and carrots I cooked under my roasted chicken

FullSizeRender.jpg

spaghetti squash with romesco sauce, blanched broccoli florets, and chicken breast 

FullSizeRender.jpg

roasted sweet potatoes (from my meal prep) topped with sunny eggs 

IMG_8194.JPG

Organic Girl 50/50 blend (I don’t know what they do to make their stuff so good, but it’s superior to ALL greens!), roasted sweet potatoes (from my meal prep), roasted chicken (also from my meal prep), some microgreens, pecans, and tahini sauce

FullSizeRender.jpg

green chili shredded chicken with blanched broccoli and spaghetti squash 

IMG_8206.JPG

Potatoes, mild Italian chicken sausage, orange pepper, green pepper omelet with kite hills chive cream cheese, and microgreens  

FullSizeRender.jpg

Grain-free turkey meatballs with romesco sauce on zucchini noodles 

FullSizeRender.jpg

Post-yoga smoothie bowl: coconut kefir blended with an orange and blueberries and topped with banana, kiwi, chia seeds, and almond butter  

FullSizeRender.jpg

Poke bowl on top of greens instead of rice from True Food Kitchen

FullSizeRender.jpg

Whole30 Chicken Alfredo

IMG_8240.JPG

chia pudding with coconut butter fat bites, almond butter, pecans, coconut flakes and banana  

FullSizeRender.jpg

sunny eggs with bacon and ham and diced potatoes with tomatoes at Local Foods

FullSizeRender.jpg

Crispy pork belly, orange pepper, and collard greens omelet with kite hill cream cheese and carrots cooked in ghee  

FullSizeRender.jpg

burger with mushroom bun , roasted carrots and turnips, and kale salad with crispy pork belly 

FullSizeRender.jpg

Spring greens with primal kitchen ranch and leftover Whole30 Chicken Alfredo  

IMG_8274.JPG

A smoothie bowl made with frozen blueberries, frozen zucchini, and almond milk kefir and topped with shredded coconut, kiwi, chia seeds, and coconut butter fat bites 

FullSizeRender.jpg

sweet potatoes and bacon and eggs 

post signature.jpeg
Comment

Creamy Pesto Rice + Sautéed Mushrooms

January 29, 2018 Jenna Hazel
jennahazelphotography-molly+josh-engaged-0192.jpg

I'm coming up on a full year of being dairy-free. Minus a few regretful pizza indulgences that left me hating myself a little (read:a lot), I have been committed and I feel so much better. Up until this year I found myself doubled over in severe stomach pain 4-5 nights a week and now it happens once every three months and usually from loosening my reigns a bit.

When I first started to cut out dairy I wasn't super convinced that was my problem, so sometimes I'd skip the cheese and other times I'd say "Ah, what the heck! It won't kill me!". I would find myself super tempted by cheese fries and cheesecake. But after a few months of avoiding it and not having any stomach issues, I knew what the problem was and avoiding it became a no-brainer. 

Being dairy-free I was so afraid of missing out on the creaminess that cheese has to offer. Like major FOMO. I knew that I didn't want to eat the artificial dairy products (vegan butter, vegan cheese, etc.) unless they had clean ingredients and feared living a creamy-cheese-less life. Unfortunately most of those dairy alternative products DON'T contain ingredients I'm cool with, so there was a period where I had to suck it up and live without creaminess. After much searching though, I stumbled upon Kite Hill cream cheese. It's made from almonds and doesn't have a lengthy list of ingredients. The first time I tried it, I was immediately obsessed! It gave me the creaminess, my cream-deprived soul was longing for. 

This recipe uses that wonderful Kite Hill cream cheese to give the rice it's creaminess. If you are dairy-free and are longing for the smoothness of a classic dairy recipe, but want to avoid the stomach ache, then look no further. This recipe is on a regular rotation in our house and dairy-free or not, it is a must try. 

jennahazelphotography-molly+josh-engaged-0179.jpg
jennahazelphotography-molly+josh-engaged-0180.jpg
jennahazelphotography-molly+josh-engaged-0185.jpg
jennahazelphotography-molly+josh-engaged-0190.jpg

CREAMY PESTO RICE + SAUTÉED MUSHROOMS 


  • 4 ounces Kite hill almond cream cheese   
  • 1 cup fresh basil leaves 
  • 1 cup spinach 
  • 1 tablespoon olive oil 
  • 2 garlic cloves 
  • 1/4 cup water or chicken broth
  • Salt to taste 


  • 3 cups rice , cooked


  • 2-3 cups mushrooms, sliced (I like a lot, but you don’t have to add that many) 
  • 1 tablespoon coconut oil 
  • Pinch of salt 


Place the almond cream cheese, basil, spinach, olive oil, and garlic cloves in a food processor and blend until combined. Slowly add the water or chicken broth until the desired consistency is achieved. Salt to taste and then combine with the 3 cups of cooked rice. 

Heat a cast iron skillet to medium heat and then add the coconut oil. Once the coconut oil has heated so that it sizzles, then you can put the mushrooms in the pan. Cook, stirring occasionally, until you notice the mushrooms begin to brown on one side. This takes about 3-4 minutes. This is when you add a pinch of salt and stir. Continue cooking the mushrooms until they've brown all around, about another 2-3 minutes. Remove from the heat and serve over the rice. 

Notes: I've used the chive flavored cream cheese and it is equally as delicious! Also, if you do not have access to kite hill products, you can soak 4 ounces of cashews in water overnight and use in place of the cream cheese here. The flavor may be a bit different and you might have to end up adding more salt than in you used the kite hill cream cheese, but you will definitely get your creaminess. I like to use the chicken stock in place of the water because it gives it a really great flavor, but it is not vegan or vegetarian friendly so if that is important to you, use water. It is important to note that the salt should not be added to the mushrooms until AFTER they begin to brown, otherwise the salt will pull the moisture out of the mushrooms and you'll end up with dry mushrooms. 

jennahazelphotography-molly+josh-engaged-0188.jpg
Comment
← Newer Posts Older Posts →
 

Hi! I’m Jenna — a creator, photographer, foodie, + travel enthusiast trying to bring some light and joy to this space! Welcome to my little corner of the internet where I share all things food + travel. Pour yourself a cup of coffee and take a look around!

GET ON THE LIST

Stay in the know! Sign up to be notified of new posts + get email exclusive content!

Your inbox will thank you.

Thank you!
To give Thanksgiving the respect it deserves I’ll keep the recipe for these slightly more Christmas-y cookies on lock down a week longer, but after that it’s free game. 🍪

If you’d like the recipe for these Rosemary Brown Butter Ch
A GIANT PUMPKIN POP TART WITH A BROWN SUGAR ICING is live on the blog! ✨

With Thanksgiving arriving in less than 2 weeks I’ve been dreaming up a dessert that feels like a good balance of both fun and tradition. This giant pumpkin pop tart brin
I had the best weekend eating (+ drinking) my way around Chicago! ✨ It always makes me so happy to be back in this city that grew me so much in my early 20’s — what a privileged to return and reflect on the ways I’ve grown and chang
NEW BLOG POST: Our favorite coffee, food, + sights in Omaha, Nebraska. 

There are truly so many places we love in Omaha! After living here for 6 years it felt like time to round up our top picks and share it with all of you. Hop over to the blog to
Fall in the neighborhood. ✨
Broccoli, couscous, pistachios, pumpkin seeds, + feta tossed with a lemon turmeric dressing for a nourishing lunch. ✨
A quick little 24 hour trip to hang with my mom. ❤️
Harissa chicken hummus plates ✨
Back on my Greek omelet kick! They’ve been such a great breakfast that has felt both fresh and nutritious! 

I added Kalamata olives, tomatoes, mint, basil, and feta in this time, but it could easily maintain the Greek vibe with some red bell p