• blog
  • about
  • Email List
  • Archives
Menu

HAZEL HAUS

Street Address
the best things in life are edible
Phone Number
A Food + Travel Blog

Your Custom Text Here

HAZEL HAUS

  • blog
  • about
  • Email List
  • Archives

Jaden's Sourdough Bread

January 15, 2024 Jenna Hazel

In Fall of 2022 my sister taught me how to make sourdough bread. Since then, anytime I post a picture of my sourdough experiments I’ve had someone ask me for tips/tricks/advice on making sourdough bread at home. The truth is, i’m not an expert — not even close. BUT because you all have been so interested in the subject I figured i’d turn to the person i know that is an expert — my sister, Jaden.

She graciously let me into her light-filled kitchen a few weeks ago and answered a few of my questions about her tips and trick on how you all can embark on your very own sourdough bread journey. Since the techniques used are much more easily understood visually I tried to capture as many photos as possible of the kneading and shaping stages to make it easier to understand. I hope you leave this post feeling inspired and ready to get baking!

Without further ado, here’s my sister’s sourdough bread journey, recipe, and tips/tricks.

How did you get into baking?

Jaden: While on my honeymoon, we spent time in Airbnbs and tried to cook dinner and breakfast to save money. It was safe to say I had no idea what I was doing. I burnt most things and everything tasted awful. I even ruined a pan of one of the ladies we were staying with. Daniel graciously ran to the store and bought her a new one and we all had a good laugh about it afterwards. Once we settled in a few months later, I was trying to decide if I wanted to go back to school. I also was new to the area so I was trying to find an avenue to make new friends. Daniel suggested I go to culinary school (Obviously for my benefit as well as his).

So I enrolled in our culinary program here in Omaha. They go through and they talk about the two sides of culinary- pastry and culinary. The intro course explained that pastry students almost never make it past the first quarter. This was partially because of the difficult of the subject, but also because the head Chef was a very difficult professor. Obviously, I was so drawn to how difficult and terrible pastry sounded, so I went with that. I don't think I could have ever prepared for how hard it was going to be, but also how fun. Yes, I cried in the walk in multiple times before, during, and after many practical's, but I also laughed until I cried with the people who I shared those classrooms with. We would spend 8-9 hours together in a kitchen, so friendships were formed quickly. What drew me to baking was initially a desire to make friends and to learn a skill that I knew I'd use everyday, but it turned into a full on obsession very quickly.

What drew you to sourdough?

Jaden: If you go back, you remember I said the head chef of the pastry department was difficult. She would not shy away from telling you what you spent hours working on looked, tasted, smelled, or "gave an overall sense of" terrible. She did not soften her words and she did NOT give out compliments unless it was perfection.

I interacted with this teacher for almost a year in all my classes, getting lots of "Jaden, rustic is not a style. This just looks like shit" and things like that, but never compliments. My friends kept my spirits up, even though I would never say cakes or chocolates were something I was good at. I was never an incredibly student in the kitchen. I really struggled and felt I never made things look quite good enough or pretty enough. I just kept going, thinking I was just going to be "okay" at everything. Well, then came breads class. I went in with the same expectations of being in the middle of the class, only to find bread is probably the only thing I would excel at. Bread is long considered to be the most difficult thing to master. Ever heard of Bread Week on Great British Baking Show? Absolute fear in those contestant eyes as Paul Hollywood prowls around their work stations. Terrifying. So I was nervous about the class, but ended up loving it.

I had one of my chefs take my focaccia to the main kitchen that served the public and tell them they needled to learn how to make it from me. I was absolutely flabbergasted. My head chef was also blown away because it took her by surprises as much as me. While others struggled as I did on every single other class, I soared to the top of the class. Why was I so good at bread? I have no idea. I hate perfection and do not like rules- both of which I've always heard you had to have in order to be good at pastries (especially bread).

I think what I like about bread is that once you know what the recipe should feel like, smell like, or look like, you can really just throw all caution to the wind. I never measure or read a recipe because I know if I add to much water I'll throw more flour in there and its fine. I don't think there's any other pastry that can be that flexibly. I also love that you don't have to frost or decorate bread. Frosting cakes is a waste of time to me and Christina Tosi and her "Naked Cake" revolution to spite her pastry chef from school is an inspiration to me. Truly Iconic. Sourdough is the queen though. There's something about spending hours kneading and folding a dough that makes it that much better. It also is such an impressive looking piece once it comes out of the oven.

What are your three top takeaways for making sourdough at home?

Jaden:

  1. Do not let the online pictures fool you. Sometimes SD is big and has crispy beautiful crust and tall, bending ear. But sometimes its a little on the flat side. They all taste the same! Don't pick and choose what you share or take to a party- they're both good!

  2. You can fit sourdough into any schedule. You control your dough, not the other way around. Use your fridge to extend stages by slowing down the yeast.

  3. Please, for all that is good and holy, just put your starter in the fridge. Don't feed it everyday unless youre making bread on a weekly basis. If you are not using it, put it in the fridge. Mine has lived in there for almost 8 months. Just give it 4-5 feedings after taking out before using and good as new!

Favorite Items for Baking SD at home?

  • Oval Bread Banneton

  • Bread Lame

  • Pizza Peel

  • Bread Pan or a Dutch oven

  • Bench Scraper

  • Pastry Mat

  • Silicon Pastry Brush

  • Mini Silicone Mats

The Stretching and Folding

The Shaping

Scoring the Bread

Jaden’s Sourdough Bread

Makes 2 medium Loaves

Feeding the Starter

  • 3 oz starter

  • 4 oz water

  • 4 oz bread flour

Step 1) Feed your starter daily if you’re going to be using it, but if you can’t use it for a while just put in the coldest part of your fridge until you want to use it again. Then remove it from the fridge and feed 8-24 hours before you want to bake bread.

Making the Bread

Levain:

  • 1 oz Starter

  • 4.78 oz Bread Flour

  • 5.32 oz Water

Step 2) Make the levain the night before by combining the starter, bread flour, and water. Cover. Allow the mixture to sit on the counter until the following morning or at least 8 hours.

  • 22 oz bread flour

  • 4.5 oz dark Rye Flour

  • 0.69 oz salt

  • 16-18oz water

  • rice flour for sprinkling on bannetons

Step 3) Add the 22 ounces of bread flour, 4.5 ounces of rye flour, salt, and water to the levain. Mix together until mostly combined. I like it to be on the more dry side as the flour will absorb the water as it sits. Let sit with slightly damp towel over it for 30-45 min.

Step 4) Stretch and fold the dough. Essentially you’re picking up the dough from one side, stretching it up, and then tucking it gently to the other side of the dough. The photos above demonstrate this well. Let the dough sit for 30-45 min. Repeat the stretching and folding until the dough is stretchy and smooth. This is how you’re developing the gluten in the bread that will give the bread structure. Usually repeating the stretching and folding process three times will get it to where you want it to be.

Step 5) Place the dough in a large bowl, cover and place in fridge for 24-36 hours.

Step 6) This is where we shape our loaves. Lightly sprinkle a little rice flour on the bannetons first to ensure your bread does not stick. Then begin shaping the dough by dividing the dough in half. Following along with the photos above. Starting on the left (or right) side, stretch the dough outward and fold it over toward the center. Repeat on the opposite side. Stretch and fold the dough from the bottom to the center. Repeat on the top. Roll the dough up from the bottom and then pinch the seam of the loaf with your fingers to seal it up. This will keep the gas from escaping during the proofing process. Place the dough in a banneton with the seam side up.

Step 7) Allow the dough to ferment in a proofing bag in the fridge (24-36 hours) (Jenna uses these shower caps to cover her bread while it its in the fridge instead of using a bag and they work great!)

Step 8) Preheat oven at 500 degree with Dutch oven or bread pan inside for 1 hour.

Step 9) Remove the bread from the proofing bag and turn upside down onto a piece of parchment paper or a silicon mat. Score the bread by using either a very sharp knife or a bread lame to cut a slit on one side of the loaf. There are lots of fun pattern inspiration out there so feel free to go crazy! It’s main purpose is just to give the heat a place to escape to while baking. Remove the bread pan or Dutch oven from the oven, place the bread inside inside (BE CAREFUL) then place lid back on.

Step 10) Bake for 15 mins with the lid on then remove lid.

Step 11) Turn the oven down to 450 degrees and Bake for 15 mins or until it has a nice and dark crust.

Step 12) Remove the bread from the Dutch oven and let cool on a wire rack completely before you cut into it.

Repeat with second loaf

In Food: Bread
Comment

Nourishing Breakfast Cookies You’ll Be Baking All Winter Long

January 10, 2024 Jenna Hazel

In 2024 I’m not making any resolutions. The pressure to avoid this or that in hopes of drastically changing my life — it just doesn’t feel good.

Instead, I’ve picked a word to guide my year — nourish.

I want to make choices that feel nourishing — step into friendships that feel nourishing, choose joyful movement that feels nourishing, and eat meals that feel nourishing.

Just looking to feel nourished all around.

These breakfast cookies are the perfect nourishing treat to get this year started off right. They’re soft, only slightly sweet, topped with sea salt (which is always a win for me!), + freeze perfectly so you can make them once and have them available all month long. They come together in just a few minutes and will have you feeling ready to take on the days ahead.

I hope you enjoy.

Nourishing Breakfast Cookies

Makes 24 cookies

Adapted slightly from Ambitious Kitchen

  • 4 large extra ripe bananas, mashed

  • 1 cup almond butter

  • 1/2 cup pure maple syrup

  • 2 large eggs

  • 2 teaspoons pure vanilla extract

  • 2 cups oat flour

  • 1/4 cup + 2 TBS flaxseed meal

  • 1 teaspoon ground cinnamon

  • 1 teaspoons baking soda

  • 1/2 teaspoon kosher salt

  • 2 cups old fashioned rolled oats

  • 1/2 cup semi-sweet chocolate chips

  • 1/3 cup shredded coconut

  • 2/3 cup chopped pecans

  • Topping:

  • Flaky sea salt, for sprinkling (don’t skip this, it’s so, so yummy!)

    Preheat the oven to 350 degrees F. Line a large baking sheet with parchment paper; set aside.

    To a blender, add the mashed bananas, nut butter, maple syrup, egg, and vanilla extract. Blend until smooth and well combined.

    Add the oat flour, flaxseed meal, cinnamon, baking soda, and salt to a large bowl. Then pour the wet ingredients into the dry ingredients. Stir by hand until just combined. Stir in the oats, coconut, chocolate chips and pecans. Allow the dough to sit for 5 minutes while you clean up and put away your ingredients. This will allow the flax seeds to work their magic and be able to hold the cookies together.

    Use a large cookie scoop to scoop the dough onto prepared baking sheets, about 3 tablespoons dough per cookie. Then using a spatula covered in parchment paper, gently press the cookies down until they are about 1/2 inch thick. Top each cookie with a few extra chocolate chips.

    Bake for 10 to 14 minutes or until they’re set, but still soft.

    Remove from the oven and sprinkle with flaky sea salt. Don’t skip this step. It makes them extra, extra delicious. Cool on the baking sheet for 5 minutes and then transfer to a wire rack to cool completely. Enjoy!

Notes:

Make sure you use really ripe bananas. I’m talking like black spots alllllll over. This will make sure that the cookies have the proper level of sweetness.

For Freezing: Once these have cooled completely you can place the cookies in a freezer safe container and freeze for up to 3 months. I like to take them out one at a time and warm up in the microwave whenever I want a nourishing breakfast on the go or afternoon treat.

In Food: Breakfast, Food: Brownies + Cookies
3 Comments

Our Favorite Coffee, Food, + Sights In Door County, Wisconsin

December 14, 2023 Jenna Hazel

Door County is a peninsula nestled between Green Bay, Wisconsin and the crystal clear blue water of Lake Michigan. Scattered throughout the peninsula there are a variety of small towns with adorable little shops and restaurants. We’ve gone the last three years with Josiah’s family and have had a lot of fun exploring. Our must do items include: a fish boil at Pelletier’s, apple picking, and taking the ferry to Washington Island. Door County is such a midwest gem that I didn’t even know about until I was an adult (even though I grew up only a handful of hours away!). Now that we’ve discovered it, we are going to continue with this yearly tradition of visiting every Fall and I am certain we will find more and more to do each year.

Where we stayed

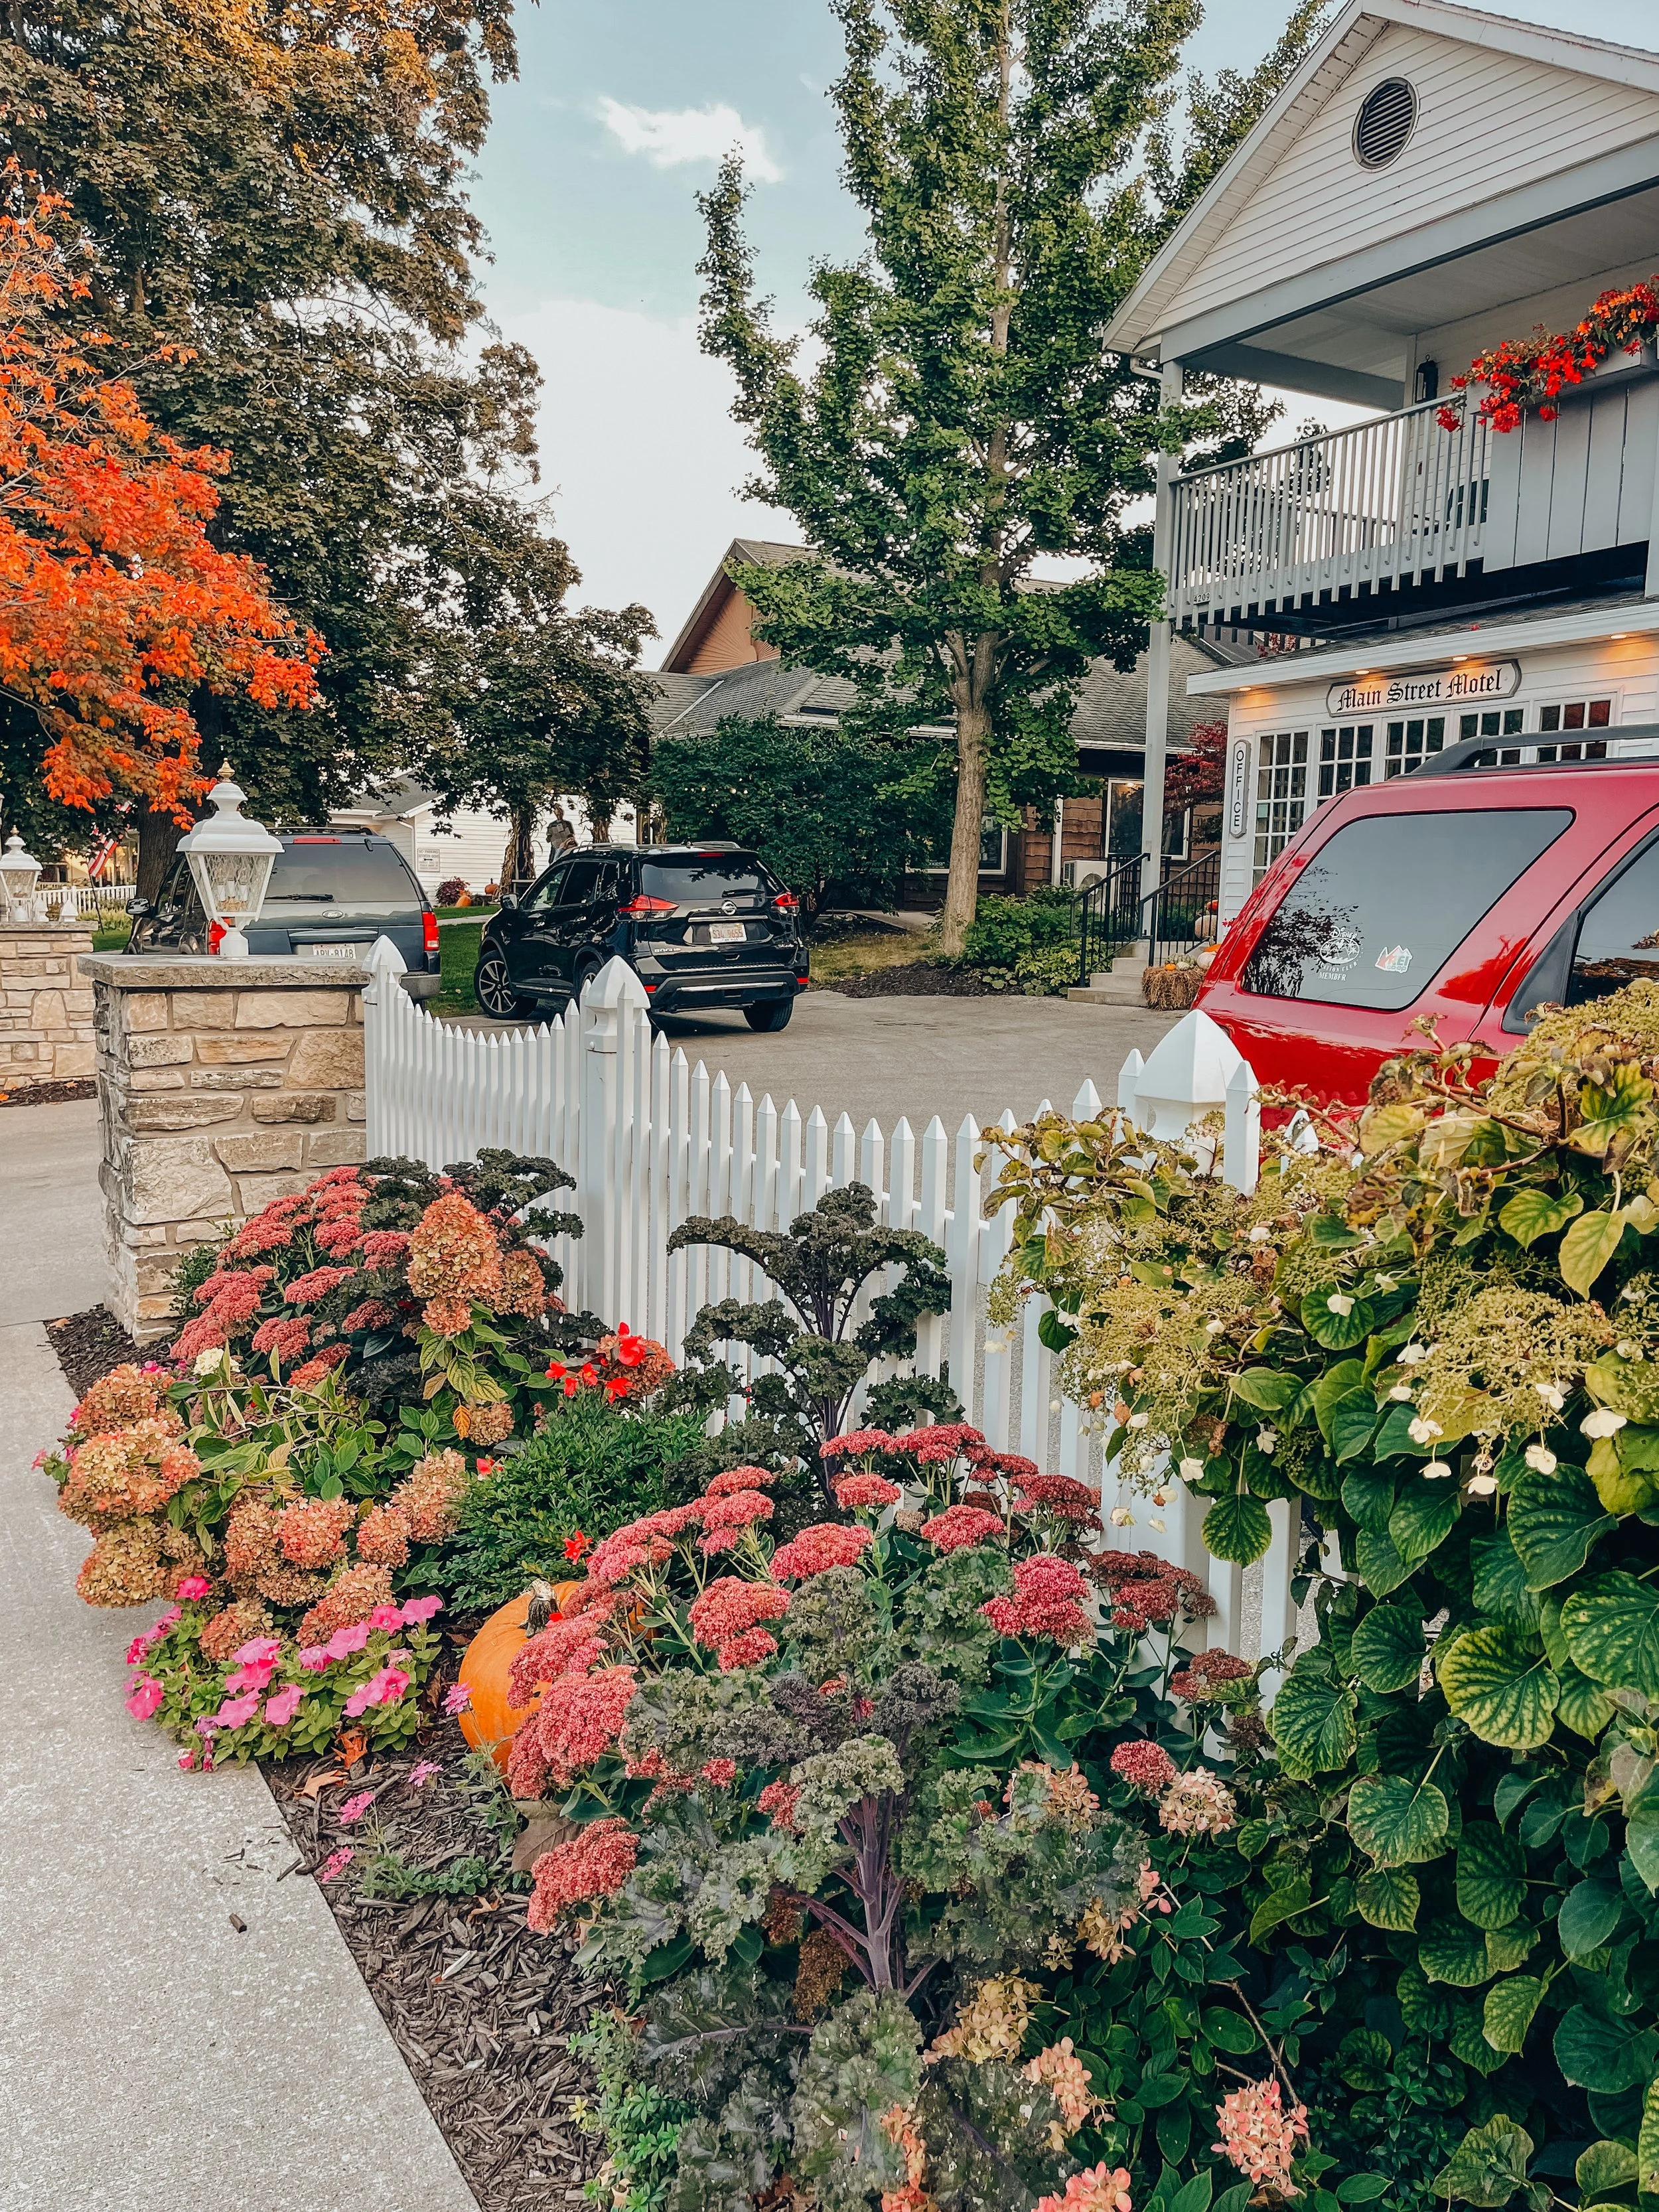
This is the house we’ve stayed in the last two years in Sturgeon Bay. I like staying in Sturgeon Bay because it’s on the most southern part of the peninsula which means it’s a closer drive to get there, but still gives us access to all of the fun things to do in and around door county with the furthest thing being about 45 minutes away. We stayed on Washington Island one year which was cool, but it was so far from everything else. If you’re looking for a remote stay and don’t have many plans to go and explore the rest of the peninsula then the island wouldn’t be a bad option. But if you’re interested in visiting the island (which you should be!) you can still do a day trip and explore everything it has to offer without actually staying there.

Transportation

To be able to explore the peninsula fully you really do need a car. If you are staying in one of the towns and just want to ride around the little town, then you can just bike. If you plan to take the washingont island ferry you could either take your car on the ferry (which is pretty pricey, but also really fun!) or you can just take your bike (or rent a bike once you get to the island).


COFFEE

Ephraim Coffee Lab - This was such a fun spot! The owner uses a manual espresso machine which was wild to me. The coffee was smooth and bright — definitely up my ally! The outdoor seating felt like you were hanging in a bohemian inspired backyard — also up my ally! They also have a super fun coffee vending machine out front so you can buy a bag whenever you want.

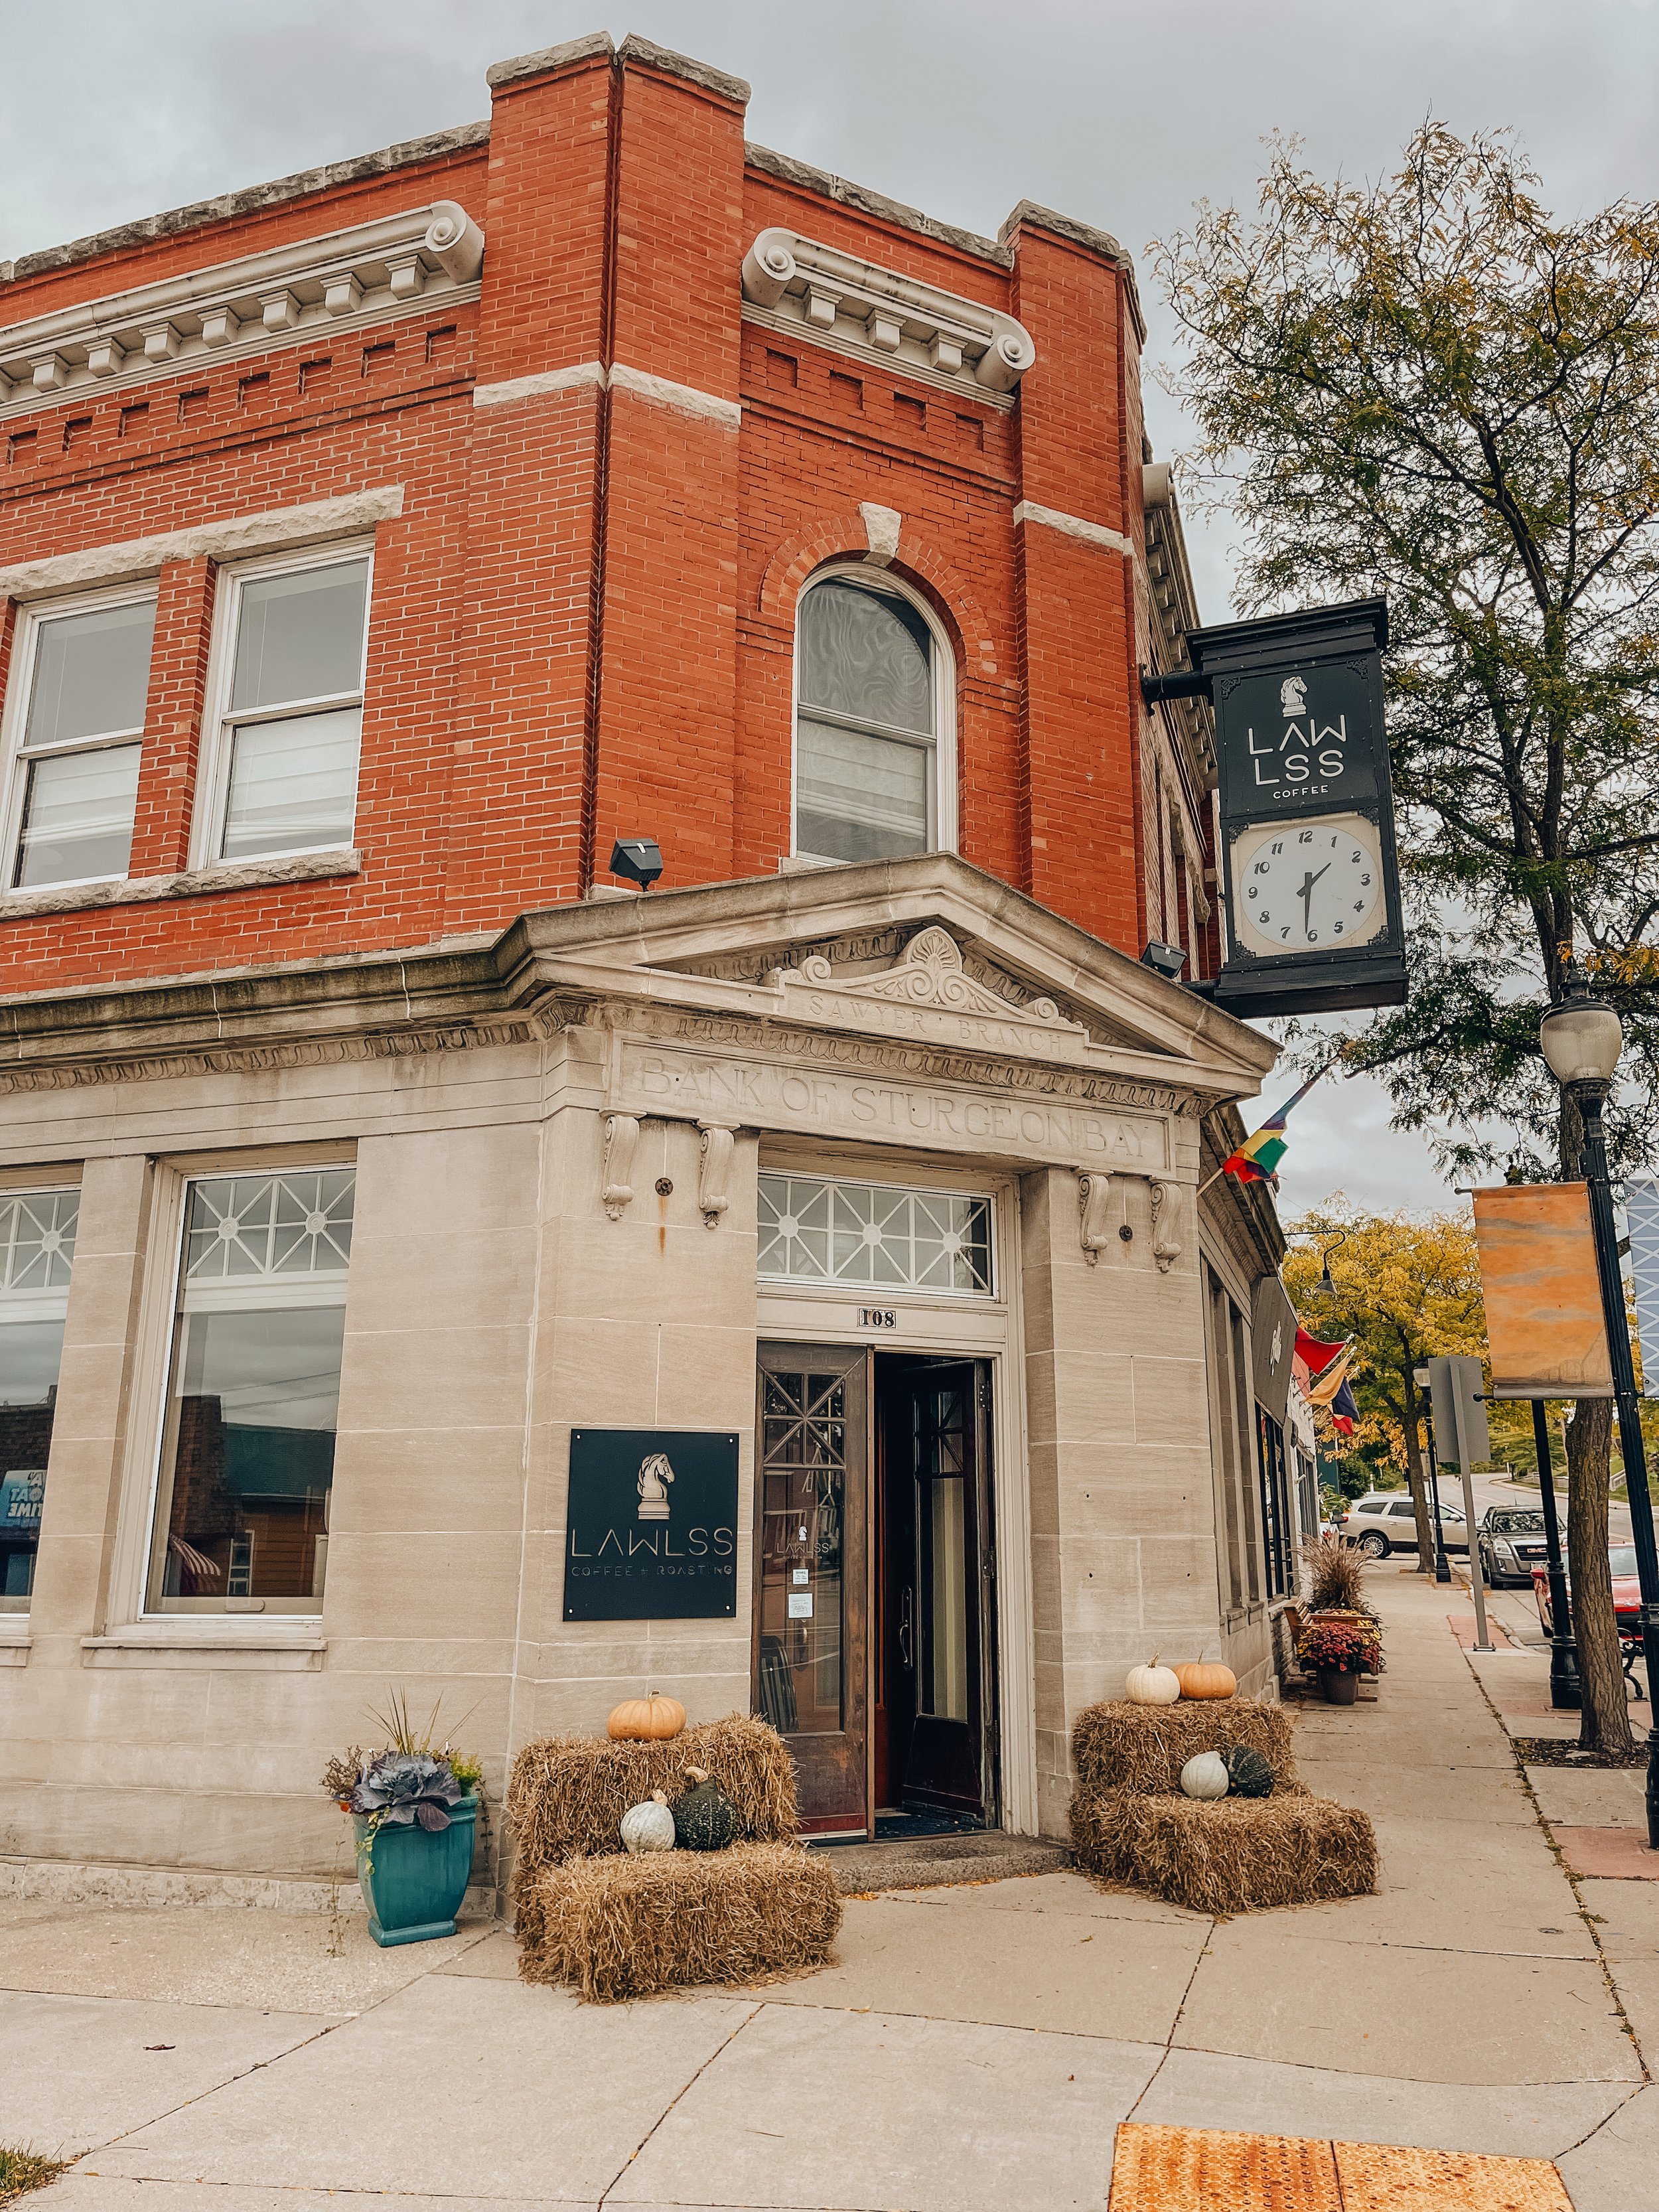
Lawlss Coffee - This shop was closest to where we stay so we ended up here a few times. I had a meeting one day we were there and the internet was much better at this shop than at the beach house. Nestled in an old bank, Lawlss Coffee had a fun atmosphere and really delicious coffee. They had some unique latte options as well as some fun pour overs. The notes on the house brewed coffee leaned more chocolatey than fruity, but was a good cup all around.

Bearded Heart Coffee - Another really fun coffee shop that was on our way from our beach house to Washington. Their iced latte was really delicious! The house brewed coffee was smooth, but also landed more on the chocolatey side of things.

FOOD

Pelletiere’s Restaurant and Fish Boil - The first year we decided we were going to go to Door County Josiah’s parents raved about the fish boil. I didn’t know what to expect and to be honest, I was kind of skeptical of how good boiled fish would be, but it definitely exceeded my expectations! Not only is the food incredible, but the experience is so fun. Everyone gathers around the giant pot that the fish and potatoes are boiled in and waits for the pot to boil over into a dramatic firey show. It’s a whole event. I really can’t recommend the experience enough! The fish is caught that day in Lake Michigan and the cherry pie dessert is made using Door County cherries — a local delight.

Sonny’s Italian Kitchen and Pizzeria - Located in Sturgeon Bay Sonny’s Italian Kitchen and Pizzeria had some really great views of the lake as well as delicious salt and the pizza.

Not Yet Licked - Great burgers. Nice outdoor seating around a creek. Playground for kids if you need somewhere to let them run around.

Bad Maravian - Detroit style pizza and majorly vibey. They have limited hours so make sure you plan ahead, but it was a really great find. It also happens to be the same building as Ephraim Coffee Lab — turns out the owner runs a coffee shop by day and a pizza shop by night — such a cool idea.

The Albatross Drive-In - This is the place we always eat when we are on Washington Island. Their burgers are so delicious and the outdoor seating is fun and quirky.

SIGHTS

Outdoor

  • Whitefish Dune’s State Park - This park has incredible hiking and really great beaches.

  • Apple /Cherry Picking - This is a classic Door County activity. There are tons and tons of orchards scattered throughout the peninsula that offer both apple and cherry picking. It’s one of our top things to do every year!

  • Schoolhouse Beach - Probably one of the more unique Door County experiences is Schoolhouse Beach. Located on Washington Island the little beach offers stunning blue water and large, smooth rocks. It’s so beautiful. We could just sit and skip rocks there for hours — and the past three years we have!

Shops

This is by no means comprehensive of all the shops that Door County has to offer and each little town has it’s own unique thing, but these are the shops that we’ve gone to that I loved and hope you love too!

  • Skal - A very fun Scandinavian boutique with lots of cookbooks I fell in love with as well as hand made sweaters and then random knick-knack-y things.

  • Keeper - Think Anthropologie + Free People — An absolute dream.

  • Fred and Co. - Adorable women’s clothing store.

  • Sister Golden - An amazing home goods store that also channels that Anthropologie energy.

  • Fish Creek Market - Adorable little grocery

  • Jackalope Trading Co. - Another cute jewelry, pottery, tapestry type boutique that I loved.

In Travel
Comment

Good Ol' Salty Pretzels

December 4, 2023 Jenna Hazel

I don’t really believe in baking secrets. It seems silly to withhold information. If I know something, I’d much prefer to share it!

So, even though I started selling these pretzels in the Hazel Haus Bake Shop and it would make sense to keep the recipe on lockdown, that doesn’t feel like the move to me. I would much rather empower you all to make pretzels at home! And then, if you don’t feel like making them, come on over and I’m happy to serve you some out my little bakery window.

But spoiler, pretzels are way easier to make than you might think. And once you’ve got the basic recipe down there is a world of possibilities ahead of you — asiago pretzel, everythign seasoning pretzel — sky is the limit!

So let’s jump into the recipe.

Good Ol Salty Pretzels

Makes 12

  • 1 and 1/2 cups lukewarm water

  • 2 and 1/4 teaspoons instant or active dry yeast, this is my favorite yeast

  • 1 teaspoon salt

  • 1 tablespoon brown sugar

  • 1 tablespoon unsalted butter, melted and slightly cool

  • 3 cups + 2 TBS all-purpose flour, plus a little for dusting

  • coarse sea salt for sprinkling

Baking Soda Bath

  • 1/2 cup baking soda

  • 9 cups water

Whisk the yeast into warm water. Allow to sit for 1 minute. Whisk in salt, brown sugar, and melted butter. Slowly add 3 cups of flour, 1 cup at a time. Mix with a dough hook attached to stand mixer until dough is thick. Poke the dough with your finger – if it bounces back, it is ready to knead.

Knead the dough for 3-4 minutes and using the dough hook on your mixer. Cover lightly with a towel and allow to rest for 10 minutes.

Meanwhile, get the water + baking soda boiling.

Preheat oven to 400°F. Line 2 baking sheets with parchment paper. Set aside.

With a sharp knife or bench knife cut dough into in 12 sections (about 70g/each). Cover lightly with a towel and allow to rest for 10 minutes.

Roll the dough into a 20-22 inch rope. Form a circle with the dough by bringing the two ends together at the top of the circle. Twist the ends together. Bring the twisted ends back down towards yourself and press them down to form a pretzel shape.

Bring baking soda and 9 cups of water to a boil in a large pot. Drop 1-2 pretzels into the boiling water for 20-30 seconds. Any more than that and your pretzels will have a metallic taste. Using a slotted spatula, lift the pretzel out of the water and onto a cooling rack to allow the excess water to drip off. Then place the pretzel on the prepared baking sheet. Sprinkle each with coarse sea salt. Repeat with remaining pretzels.

Bake for 12-15 minutes or until golden brown.

Remove from the oven and enjoy!

In Food: Bread
Comment
← Newer Posts Older Posts →
 

Hi! I’m Jenna — a creator, photographer, foodie, + travel enthusiast trying to bring some light and joy to this space! Welcome to my little corner of the internet where I share all things food + travel. Pour yourself a cup of coffee and take a look around!

GET ON THE LIST

Stay in the know! Sign up to be notified of new posts + get email exclusive content!

Your inbox will thank you.

Thank you!
To give Thanksgiving the respect it deserves I’ll keep the recipe for these slightly more Christmas-y cookies on lock down a week longer, but after that it’s free game. 🍪

If you’d like the recipe for these Rosemary Brown Butter Ch
A GIANT PUMPKIN POP TART WITH A BROWN SUGAR ICING is live on the blog! ✨

With Thanksgiving arriving in less than 2 weeks I’ve been dreaming up a dessert that feels like a good balance of both fun and tradition. This giant pumpkin pop tart brin
I had the best weekend eating (+ drinking) my way around Chicago! ✨ It always makes me so happy to be back in this city that grew me so much in my early 20’s — what a privileged to return and reflect on the ways I’ve grown and chang
NEW BLOG POST: Our favorite coffee, food, + sights in Omaha, Nebraska. 

There are truly so many places we love in Omaha! After living here for 6 years it felt like time to round up our top picks and share it with all of you. Hop over to the blog to
Fall in the neighborhood. ✨
Broccoli, couscous, pistachios, pumpkin seeds, + feta tossed with a lemon turmeric dressing for a nourishing lunch. ✨
A quick little 24 hour trip to hang with my mom. ❤️
Harissa chicken hummus plates ✨
Back on my Greek omelet kick! They’ve been such a great breakfast that has felt both fresh and nutritious! 

I added Kalamata olives, tomatoes, mint, basil, and feta in this time, but it could easily maintain the Greek vibe with some red bell p